google-site-verification: google70410e9e92d4fda2.html

Thursday 31 July 2014

Stamp Set Showcase Week 3 (6)

For todays card we have gone for VIVID VASES
And before you yell at me .... there is no LABEL LOVE stamp today ... I know. And the reason is because I dropped the stamp set on the floor and the stamps came tumbling out ... a couple went under the dressers in my workshop. As someone that has had a spinal injury, with restricted mobility, the floor is a place I can never go without having a crane on hand to get me up again he he .... so I called for my hubby, and he had torches out looking under the dressers ... but the stamp I wanted is still proving difficult to reach, so I decided to post without the stamp (I didn't want to duplicate a stamp I have already used.

So perhaps you could let me have suggestions on where I should place the stamp when it eventually surfaces ... or maybe you have a super efficient way of retrieving stamps from under built in units? 

So although we are today missing my much loved Label Love stamp, I have kept the Blendabilities theme going for today and hope you like the card.


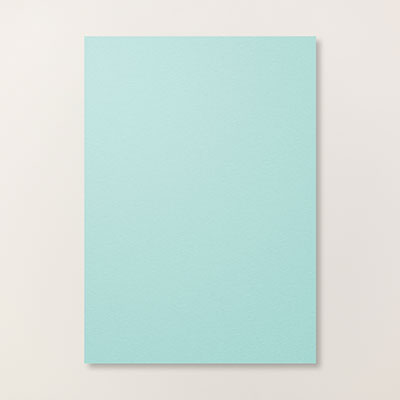
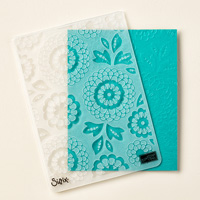
So today I am using the Vivid Vases stamp, having coupled it with In Colour cardstock, and the wonderful new Textured Impressions Embossing Folder (TIEF) Lively Lace. I am totally in love with it! Very Vintage and Very Me. But coupled with Tangelo Twist cardstock, one of the new Stampin up vibrant In Colours is in contrast to the embossing folders vintage feel, yet it works. At least I hope you think it does?


And so to the  tutorial bit lol

Begin by triming a piece of whisper White cardstock to 30cms x 15cms to create  your card blank. Score the long side at 15cms.

Trim a piece of whisper white cardstock to 10.5cms x 10.5cms
Stamp the Vivid Vases image using black Memento ink. Give the ink a couple of seconds to dry, and then use the ivory Blendabilities pen to colour in the vases. then use the lightest shade of blendabilities for the different flowers (I used Cherry Cobbler, Daffodil Delight, Night of Navy, Coastal Cabana,  & Pumpkin Pie)

Repeat this on a scrap of Whisper White cardstock, but use all three shades to colour in the images. Once the cardstock has dried, use paper snips to cut out each vase/flower. 
apply Stampin Dimensionals to the back of the cut out vases (you may need to cut down some of the dimensionals so they do not show once mounted on top of the first set of vases you stamped & coloured (i,e, the 10.5 x 10.5cms piece of stamped cardstock).
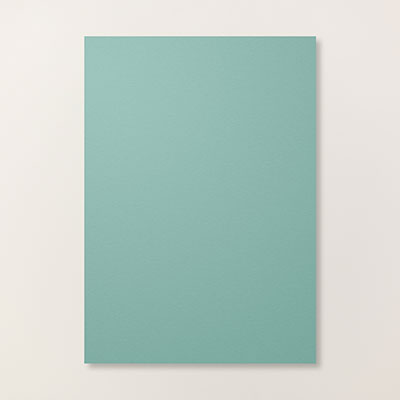
Layer this onto a piece of Daffodil Delight cardstock measuring 22cms x 11cms.


Now for the emvossing. Trim a piece of Tangelo Twist cardstock to 14.5cms x 14.5cms. Now there is a little tip for embossing this cardstock because it is wider than the embossing folder. And the trick is to line up the cardstocl with the edge of the embossing folder and run through the Big Shot or Texture Boutique in the normal way. Then move the embossing folder over and line up the pattern with the piece you have already embossed. This time you need to put the cardstock/embossing folder throut the machine with the farthest side of the embossing folder to the entrance of the big shot (this might not fit through the texture boutique), but do not pass the folder right the way through. You want to run the folder through until you have just ost sight of the edge of the embossing folder, then wind it back out the way it went in. This should avoid any unsightly lines on the dry embossed cardstock. 
Practice with scraps until you get this right. It is worth the extra trouble.

Tie a piece of Daffodil Delight ribbon around the Daffodil Delight cardstock (the piece you layered  the stamped image onto).
Apply Stampin Dimensionals to the reverse and adhere centrally to the Tangelo Twist embossed cardstock. Layer this onto your card blank.

Job done! Now it is your turn.

Happy Stamping
Kim xxx
Table built using Product Table Builder by The Crafty Owl - Independent Stampin' Up! Demonstrator.

Contact us for details of our Bespoke Handmade Greetings Cards, Wedding Invites, Favours, Gift Boxes etc

Telephone: 08432896848
Text: 07759587004

Or Order Online 24/7


Wednesday 30 July 2014

Stamp Set Showcase Week 3 (5)

Day 5 of this weeks Stamp Set Showcase
Have you worked out what is in common with all of this weeks projects?? Yes?

Well, you do not need to purchase stamp sets made specifically with Blendabilities in mind. You can use Stampin Ups Blendabilities pens with anything except solid stamps.
So this week I have been making cards that pre-date Blendabilities here in the UK, just to show you just a little of the scope they offer.

Yes, I love the stamp sets aimed at being used with Blendabilities, and I have some of them, but I have had great fun working with many of my other stamp sets too.

So today I have  couple LABEL LOVE with BABY WE'VE GROWN stamp sets

As a rabbit breeder & exhibitor, I have a really soft spot for this lovable little bunny and have used him for all kinds of projects. And I set myself a challenge to produce a card with lots of 'White Space'. As a lover of vintage/retro styles of cards, I struggle with whitespace. If you are wondering what I am talking about, well it is seen as ideal to allow some space with nothing going on (white space). It doesn't have to be white, it could be any colour cardstock ... give it a go and let me know how you get on. My card today does have white, white space ....


Here is how to make it ...
Trim a Piece of Whisper White Cardstock to 10cms x 10cms
Use Memento Black ink to stamp the Sweet Baby and the rabbit stamps onto the above piece of cardstock.
Colour in the rabbit and the sweet baby stamp using Coastal Cabana Blendabilities pack.
Layer the coloured panel onto a piece of 10.5cms x 10.5cms piece of Island Indigo cardstock. Apply Stampin Dimensionals to the reverse of this panel.


Next trim a piece of Lullaby Designer Series Papers (DSP) to 14cms x 14cms.
Layer this onto a piece of 14.5cms x 14.5cms Island Indigo cardstock. Apply Stampin Dimensionals to the reverse.

Trim a piece of Pool Party cardstock to 15cms x 7cms. Run this through your Big Shot or Texture Boutique with the Lovely Lace Textured Impressions Embossing Folder (TIEF). Apply this to the center of  the DSP panel. Tie around a piece of Coastal Cabana Thick Bakers Twine and tie a bow.
Cut a Tea Lace Doily in half, concertina fold it and adhere to the top left of a 15cms x 15cms Whisper White Card blank, Then mount the Sweet Baby panel at an angle top of the dry embossed panel.


Finally stamp the Label Love 'cutest baby ever' stamp onto a scrap of Whisper White cardstock using Island Indigo ink. Punch out the sentiment using the Artisan label punch. 
Punch two more labels using Island Indigo cardstock. These are going to make your layered label. To do this, simply cut one through the middle vertically, and the other horizontally. Adhere the corresponding pieces to the reverse to of the stamped label using Tombow Glue.
Apply Stampin Dimensionals to the reverse & stick to the top left of the card.

Complete the card by adding a few blue Candy Dots (from the subtles collection)

Happy Stamping
Kim xxx
Table built using Product Table Builder by The Crafty Owl - Independent Stampin' Up! Demonstrator.


Contact us for details of our Bespoke Handmade Greetings Cards, Wedding Invites, Favours, Gift Boxes etc
Telephone: 08432896848
Text: 07759587004
Or Order Online 24/7


Tuesday 29 July 2014

Stamp Set Showcase Week 3 (4)

Day 4 of the LABEL LOVE Stamp Set Showcase

Today I have paired it up with the Today & Everyday Stamp Set.

This card is also this weeks quick and simple card make - easy to make in less than 10 minutes


Begin by Trimming a piece of Baked Brown Sugar cardstock to 14.3cms x 10cms.
Trim a piece of Pool Party cardstock to 13cms x 7cms
Trim a piece of Whisper White cardstock to 12,5cms x 6.5cms
Using Memnto Ink (Black) stamp the Chinese Lantern image onto the smallest rectangle of Whisper White cardstock.


Now for the fun part. Colouring in. Go gently with the brush tip of the lightest pen in the Coastal Cabana Blendability pen set. You are going for a water colour effect here, so do not completely colour in the lanterns, and do not worry if the ink bleeds outside the stamp edges. 
Use the medium pen in the set to create shaded areas


Layer the stamped cardstock onto the pool party cardstock. Then layer that onto the Baked Brown Sugar trimmed piece of cardstock.
Finally, on a scrap piece of Whisper White cardstock, stamp the Best Friend Ever stamp using Lost Lagoon ink.
Punch out using the Artisan Label Punch.
Punch a further two Artisan Labels in Lost Lagoon cardstock (to make a frame for the sentiment stamp)
Cut one thlabel on the vertical and the other on the horizontal, leaving 2 side pieces, a top and a bottom piece. Stick these to their corresponding areas of the stamped label, leaving a small border to make the frame. I find Tombow multi-purpose glue best for this as you have a few seconds to move things about before it sets.. Apply Stampin Dimensionals to the reverse, and stick to the layered card

I told you this would be quick and simple didn't I. But do contact me if you are struggling with any of my instructions as I do my blog posts late at night and often fall asleep whilst typing!

Happy Stamping
Kim xxx
Table built using Product Table Builder by The Crafty Owl - Independent Stampin' Up! Demonstrator.


Contact us for details of our Bespoke Handmade Greetings Cards, Wedding Invites, Favours, Gift Boxes etc

Telephone: 08432896848
Text: 07759587004

Or Order Online 24/7