
Good Morning Ladies and Gentlemen
Today we are going to have a little fun with the Envelope Punch Board.
I will be learning alongside you as I keep putting off getting to know my EPB
Todays make incorporates one of Stampin Up's Kraft gift Boxes, and YIPPEE SKIPPEE stamp set to create a gift tag
But rather than use ready printed Designer Series Paper, I thought we could make out own using the Blooming With Kindness Flower Stamp and Marina Mist ink
You could change the tag and use it as a Christmas gift box if you are not in to making your own, or don't have the time but want to give attractive gifts,

So we begin by constructing the gift box. I am using the Decorative Window Gift box as it has a pretty printed white design going around the window.
The boxes come in packs of 6, and are flat packed.
They are pre-scored, so constructing the box is really easy. I find a Bone Folder is the easiest way of creating a crisp edge along the score lines.

Now for the rubber stamping
Get an A4 sheet of Very Vanilla Cardstock.
Mount the Flower in the Blooming With Kindness stamp set on a similar sized acrylic block (skip this if you are using wood mounted stamp)
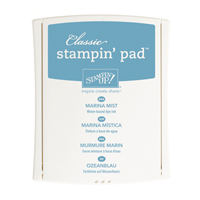
Ink up the stamp with Marina Mist ink and randomly stamp the cardstock using first, second and third generation stamping (see yesterdays blog for 'how to' guide).

Trim 1 piece of your stamped cardstock to 20cms x 3cms
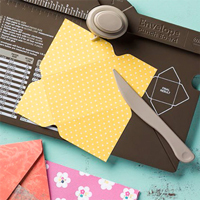
Get your EPB and line up the cardstock with the 10cms mark on the baseboard of the EPB, Punch but do not score.
Rotate by 180 degrees and repeat the above step.
Rotate by 90 degrees and line up the right hand edge of the cardstock with with the right hand edge of the hole where the punch is located & punch.
Flip the cardstock over and repeat. Repeat this with the other end of the strip of cardstock.
This will create your tapered ends for the bow.
Get out your Tombow MP . Gently bend the to outside edges and adhere them to the tapered
centre of the strip. This will be the bow.
To create the tails for the bow, you need to cut another strip of your hand stamped backing paper to 12cms x 3 cms.
Line up the strip with the 6cm mark on the base of the EPB & Punch (do not score).
Flip over and repeat.
Now rotate the cardstock by 90 degrees and line up the right hand edge of the cardstock with the right hand side of the gap in the EPB & Punch - this will create the banner end to the bow tail.
Rotate by 180 degrees and repeat.
Pop a small dit of Tombow MP glue to the underside of the folded bow, and adhere the tails to the bow. Apply Stampin Dimensionals to the back and mount on the box/
Now for the Tag
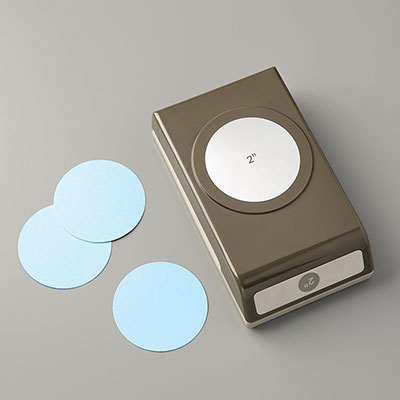
Stamp the Power Of Two stamp from Yippee Skippee stamp set onto a scrap of Very Vanilla cardstock. Get the light Coastal Cabana Blendabilities pen and apply tome colour tot he tag using the brush tip. Die cut the tag using the 2" circle punch.
Die cut another circle from Pool Party cardstock. Apply stampin Dimensionals to the reverse of the blue tag and the stamped tag and adhere to the window of the box
And that is it ... job done! Now over to you ...
Happy Stamping
Kim xxx
Contact me to
order:
Telephone/Txt:
07759587004
Email: stampinupatthewarren@hotmail.co.uk
Or Order Online
24/7
Or Click on the
image of the products used below and it will take you straight to my online
store
 |  |  |  |  |
 |  |  |  |  |
 |  |  |  |  |
 | 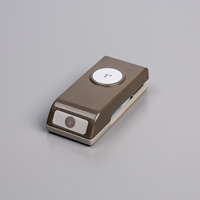 |
Table built using Product Table Builder by The Crafty Owl - Independent Stampin' Up! Demonstrator.


No comments:
Post a Comment