
The week is flying by .... and today I have been making the projects for next weeks blogs
and there will be a touch of autumn and winter in the creations all worked around one sentiment stamp set !!! So watch this space ...
BUT we have today and tomorrow to go before we get there and I hope you enjoy what I have for you.
Todays PERFECT PENANTS creation is using Tea for Two Designer Series Papers (DSP) which is in the Clearance Rack on my website so get yourself over there and bag yourself a bargain by clicking here
But once it's gone, it's gone
Anyway ... back to todays card

You need to to make a 6" card blank by trimming an A4 piece of Whisper White cardstock to 15cms x 30cms
Score the long side at 15cms, fold the score line and burnish with a bone folder
Select your sheet of Tea for Two DSP and trim to 14.5cms x 14.5cms
Mount this onto your card blank using either Sticky Strip or a teeny amount of Tombow MP Glue
Next, trim a piece of Real Red cardstock to 14cms x 14cms
Now here is the wonderful thing with Stampin Up DSP ... it is double sided, so you can be really resourceful by using the reverse side of the DSP for the smaller layer.
So trim the reverse side to 13.5cms x 13.4cms
Mount this onto the Real Red cardstock.

Cut a Tea Lace Doily in half and fold over the straight edge by 1cm. Use a little Tombow MP glue and adhere the doily to the card (place the fold over the edge of the card and secure with Tombow,
Wrap around some Real Red 3/8" Taffeta Ribbon and tie a neat bow (use the bunny ears method).
Apply Stampin Dimensionals to the reverse of this panel and mount onto the card blank

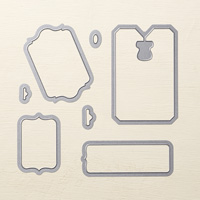
Now for the sentiment, and we are going to be using the Chalk Talk framelits for this.
Begin by stamping the sentiment onto Whisper White cardstock & use the middle sized label to die cut the sentiment.
Cut a further two labels from the same DSP that you used for the first layer of the card
Cut one of these in half on the horizontal, and the other on the vertical.
Next you need to use Tombow MP Glue to adhere the corresponding sections of the sentiment label so you are creating a frame. Add Stampin Dimensionals to the reverse and mount onto the card
Add a few Basic Rhinestones and you have your card
If you would like to ask any questions on techniques or products, or anything else related to my blog posts, please feel free to ask away
Happy Stamping
Kim xxx
Contact me to order:
Telephone/Txt: 07759587004
Email: stampinupatthewarren@hotmail.co.uk
Or Order Online 24/7
Or Click on the image of the products used below and it will take you straight to my online store
 |  |  |  |  |
 |  |  |  |  |
 |  |  |  |  |
 |  |  |  |
Table built using Product Table Builder by The Crafty Owl - Independent Stampin' Up! Demonstrator.


No comments:
Post a Comment