Well here we are, the end of yet another Stamp Set Challenge.
I swear that as we get older, the days, months and years pass faster and faster, don't you think?
As a small child it seemed like a lifetime to wait for my next birthday, or Christmas
But boy, it was always worth the wait to enjoy spending and sharing time with family and friends.
So I kind of hope all of you will think it worth the wait for the next Stamp Set Challenge .... I was going to say that 1 day is not long to wait, but if you are my 4 year old grandaughter, that seems an unbearable length of time to wait for ANYTHING he he
Anyway, todays final PERFECT PENNANTS Card is blended with PERFECT BLEND
I adore this stamp set. Not least because I am a total coffee addict whose husband has to ration her to no more than 3 cups a coffee a day or the killer migraines return.
And me being me, I have also snuck in another stamp set ... this time the POSITIVELY CHEVRON background stamp.
And here is the 'How To' tutorial
you will need an A6 Whisper White card Blank, keep to one side for a moment
Next trim another piece of Whisper White cardstock to 14.3cms x 10cms
Get out the Positively Chevron background stamp, and ink it up with Calypso Coral ink, stamp into the the Whisper White cardstock. Apply Stampin Dimensionals to the reverse side.
Wrap a piece of Burlap Ribbon across the middle of the card, and then mount onto your card blank.
Next you are going to need some Designer Series Paper (DSP), a scrap of Whisper White cardstock and a scrap of Soft Suede cardstock
Ink up the Coffee cup stamp with Soft Suede ink and stamp onto that scrap of DSP, then repeat by stamping onto the scrap of Whisper White cardstock, and lastly, stamp again onto Soft Suede cardstock. Make sure you re-ink the stamp between each stamping.
You just need the lid section of the Whisper White stamped cardstock, so cut this section our using paper snips. Then cut out all of the images on the DSP and the Soft Suede cardstock.
Apply Stampin Dimensionals to the reverse of all 2 pieces, but the DSP needs to have double depth of Stampin Dimensionals on the reverse.
Mount the coffee cup cap onto the DSP cup
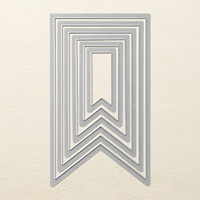
Stamp the HELLO stamp onto Whisper White cardstock and die cut using the Banners Framelits and your Big Shot
Attach to the Soft Suede Coffee Cup with a Stampin Dimensional, and then mount onto the card blank, then mount the DSP cup overlapping the other.
Finally, stamp the Coffee & Friends in Soft Suede ink onto Crumb Cake cardstock. Die cut using the Banner framelits again, add a few Basic Rhinestones and you are done
If you would like to ask any questions on techniques or products, or anything else related to my blog posts, please feel free to ask away
Happy Stamping
Kim xxx
Contact me to order:
Telephone/Txt: 07759587004
Email: stampinupatthewarren@hotmail.co.uk
Or Order Online 24/7
Or Click on the image of the products used below and it will take you straight to my online store
Table built using Product Table Builder by The Crafty Owl - Independent Stampin' Up! Demonstrator.


No comments:
Post a Comment