
Welcome to a new weekend
I hope you have lots if nice things planned. Perhaps you are preparing for your Fireworks Party? Do let me know?
Me, well I will be preparing nest week's Blogs posts which means a day of crafting
And I so love getting a day to myself to craft, and also prepare for this weeks card craft classes.
But for the moment, here is todays card make from
BRIGHT & BEAUTIFUL STAMP SET
And todays card is made using Vellum

Begin by making your card blank by trimming a sheet of A4 Whisper White cardstock to 14.8cms x 21cms. Score the long side at 10.5cms, fold along the score line and burnish the fold with your bone folder.

Next, trim a piece of Whisper White cardstock to 10cms x 14.3cms.
Using your Versamark ink pad, ink up the Lucky Stars Textured impressions Embossing Folder (TIEF) on the side with the Sizzix logo with Versamark ink I(i.e. using the TIEF into a Stamp) Now ink up the TIEF using Coastal Cabana ink.. Insert the piece of trimmed Whisper White cardstock into the TIEF and run through your Big Shot.
Remove the cardstock from the TIEF and sprinkle the cardstock with Clear Embossing Powder. Tap off the excess powder , and then give one sharp rap on the back of the cardstock to remove loose powder.
Heat with the heat tool until the embossing powder has melted. You should be left with indented(debossed)stars that are blush coloured and a glossy finish to the cardstock.
Next, Stamp all three stars from the Stamp Set onto Vellum as follows using Versamark ink and sprinkle with Silver Embossing Powder.and heat with the Heat tool until the embossing powder has melted
Now for a bit of sponging to the starts at follows:
Large Star -Tempting Turquoise
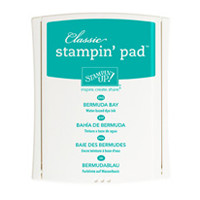
Medium Star - Bermuda Bay
Small Star - Versamark & Coastal Cabana
Die cut the Vellum Stars using the Stars Framelits.
Layer up the Stars using Stampin Dimensionals between each layer and the bottom layer.
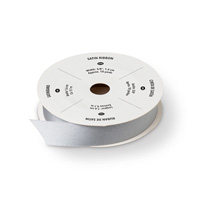
Wrap around some 5/8" Silver Satin Ribbon and tie a bow.
Stamp the Season Greetings Sentiment onto a scrap of Whisper White cardstock using Tempting Turquoise Ink. Die cut using the Apothecary Accents Framelits Collection.
Finish by sponging the edges of the sentiment die and cut, and add a Basic Rhinestone tot he centre of the smallest vellum star.
Another card finished to add to your card stash

If you
would like to join my community board on my Pinterest account to post your own
photo's
ping me
your email address and I will add you
kim@stampinupatthewarren.com
If you would like
to ask any questions on techniques or products, or anything else related to my
blog posts, please feel free to ask away
Happy Stamping
Kim xxx
Contact me to
order:
Telephone/Txt:
07759587004
Email: kim@stampinupatthewarren.com
Or Order
Online 24/7
Or Click on the
image of the products used below and it will take you straight to my online
store
 |  |  |  |  |
 |  |  |  |  |
 |  |  |  |  |
 |  |  |  |  |
 |  |
Table built using Product Table Builder by The Crafty Owl - Independent Stampin' Up! Demonstrator.
 http://www.stampinupatthewarren.stampinup.net

No comments:
Post a Comment