
Now, yesterday you saw the card I have made for my youngest Granddaughter.
Todays card is for my Grandson (7 years old) and I am all too well aware that this could be the last year he 'believes' and so we are making the most of it.
He has had letters from Santa AND a video from Santa, AND Santa will be here on Christmas Morning
And we have been giving him the story of The Nutcracker
So this card seemed just fitting don't you think
This will be the last Christmas Card of this year, but we still have a weeks worth of gifting ideas, packaging ideas and maybe a few more tags before the 25th December Arrives.
Today also sees another of the Simply Stars Kit boxes. This one I lovingly faux cross stitched the box using a White Umi Ball Gell Pen. I also layered the box up with Some Red Glimmer Paper and some additional Kraft Cardstock.

For the card, I have used the double sided printed Kraft Card Under The Tree Specialty Designer Series Papers (DSP). One sheet of paper but using both sides of the cardstock,
You will also need your Blendability Alcohol Pens for the colouring in and some mini Brads
Begin by Trimming one piece of the DSP to 14 cms x 14 cms (the red side)
And another piece to 12 cms x 12 cms (brown snowflake side)
Next wrap a piece of 5/8" Gold Satin Ribbon across the middle of the smaller layer and secure on the back of the cardstock with Sticky Strip.
Apply Stampin Dimensionals to the reverse and adhere on top of the larger layer. Apply Dimensionals to the back of the larger layer and adhere to a 6" square White Card Blank

Next, stamp the Nutcracker onto Whisper White cardstock using Black Memento Ink
Leave to dry for approximately 30 seconds before colouring him in.
I used a combination of Cherry Cobbler Assortment and Crumb Cake Assortment for the had.
The eyes are coloured with coastal Cabana assortment
The collar with Cherry Cobbler
And the 'Stache' with the Skin Tone Assortment.
Use your Pierce it Tool to make small holes where the white circles are on his hat and insert Mini Brads. Do the same with his collar clasp.
Apply Stampin Dimensionals to the reverse side.
Stamp and extra moustache onto whisper white cardstock and colour the same as above. Die cut this one and attach, add Dimensionals to the reverse and adhere on top of the first Moustache.
Mount the Topper onto the Card.

If you would like
to ask any questions on techniques or products, or anything else related to my
blog posts, please feel free to ask away
Happy Stamping
Kim xxx
Contact me to order:
Telephone/Txt:
07759587004
Email: kim@stampinupatthewarren.com
Or Order
Online 24/7
Or Click on the
image of the products used below and it will take you straight to my online
store
 |  |  |  |  |
 |  |  |  |  |
 |  | 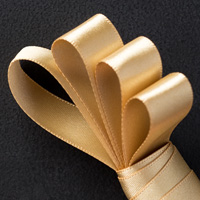 |  |
Table built using Product Table Builder by The Crafty Owl - Independent Stampin' Up! Demonstrator.


No comments:
Post a Comment