
Today I have a Funky Fun Butterfly Card for you using a combination of
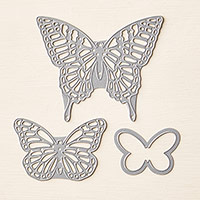
Swallowtail Stamp & the new Butterfly Framelits
The fun bit is that funky dotty background made using Sponge Daubers.
In fact I made this card before yesterdays card, and used the residual ink on the sponges from todays project, to make yesterdays .... are you following me on this, because I am managing to confuse myself!
Anyway, you will be pleased to learn that there are very few products needed for today, so here is your products list:
Stamp Set:
Itty Bitty Banners
Swallowtail
Die:
Bitty Banners
Butterfly Framelits (Spring/Summer Catalogue)
Classic Ink Pads:
Lost Lagoon
Tangello Twist
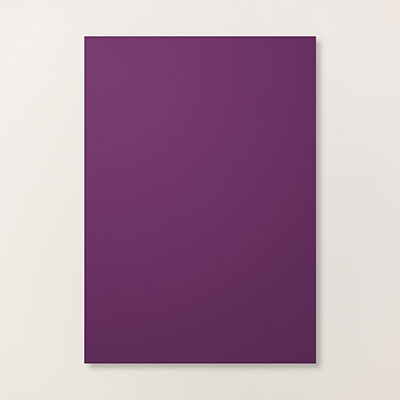
Blackberry Bliss
Cardstock:
Whisper White
Blackberry Bliss
Accessories:
Basic Rhinestones
Adhesives:
Stampin Dimensionals
Tombow Multi-Purpose Liquid Glue
Glue Dots
Tools
Big Shot with Magnetic Platform
Sponge Daubers
Todays card uses the same techniques as yesterday, so I will refer you back to yesterdays blog post when I get to the die cutting of the butterfly rather than wittering on and boring you to death ! I's sure you will agree this is the most sensible plan? At least I hope you do he he

Begin by trimming a piece of Whisper White Cardstock to 14.3 cms x 10 cms
Take 3 sponge daubers and ink each one in a different one of the three colours using the Classic Ink Pads. Make sure you ink them up well. You might want to have a test run on some scrap paper to practice the amount of ink and the pressure needed to get the best result. You want nicely defined circles for the best effect. Randomly stamp your daubers on the trimmed piece of cardstock.
Don't over do it or the butterfly will lose it's impact.

Next you need to Stamp the Swallowtail stamp over the background you just created using Lost Lagoon ink.
Now die cut the large framelit from the Butterflies Framelits set from Blackberry Bliss cardstock.
Now you need to pop over to yesterdays blog to read about the way I die cut intricate dies to take almost all the hard work from prizing out all those teeny bits of cardstock from the die cut.
Don't forget to then come back here ha ha
Adhere the die cut to the card front using Glue Dots and embellish with 5 Basic Rhinestones
To Finish the project, you need to stamp the sentiment of choice from the Itty Bitty Banners Stamp Set using Blackberry Bliss ink onto Whisper White cardstock
Die cut using the corresponding Die in the Bitty Banner Framelits pack.
Make a layered label by die cutting two more of the same banner using Blackberry Bliss cardstock.
Cut one in half on the vertical and the other on the horizontal plan. Attach the corresponding pieces to the back of the sentiment label using teeny amounts of Tombow Glue. Apply a couple of Stampin Dimensionals to the reverse of the label and adhere to the card front.
Add some Stampin Dimensionals to the reverse of the card front and attach to an A6 card blank.
Now over to you .... Why not post on my Pinterest Community Board with your own version of this card as I would love to see them (see below for more details)

If you
would like to join my Pinterest community board where you will be able to post
your own Stampin Up creations. Simply email me and I will add you to the board
If you would like
to ask any questions on techniques or products, or anything else related to my
blog posts, please feel free to ask away
Happy Stamping
Kim xxx
Contact me to
order:
Telephone/Txt:
07759587004
Email: kim@stampinupatthewarren.com
Or Order
Online 24/7
Or Click on the
image of the products used below and it will take you straight to my online
store
 |  |  |  |  |
 |  |  |  |  |
 |  |  |  |  |
 |  |  |  |
Table built using Product Table Builder by The Crafty Owl - Independent Stampin' Up! Demonstrator.


No comments:
Post a Comment