
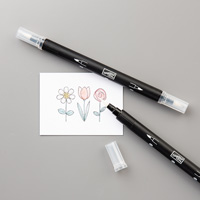
The card I am sharing with you today is a combination of 3 different techniques:
Blender Pen Colouring Technique
Sponging colouring Technique
&
Marker Pen Colouring Technique
And I like to think that the three techniques blend together. I have even snuck in a third colouring technique ... and that would be sponging!
The three, sorry four, techniques give a different look to the various elements of this card.
I have used Stampin Up!s new Thicker A4 Cardstock to create this 15 cm (6") square card base
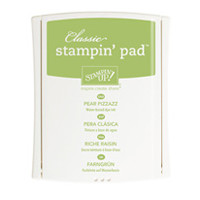
The first layer was some Designer Series Paper, Timeless Elegance, which I sponged with a combination of Pear Pizzazz and Blushing Bride inks
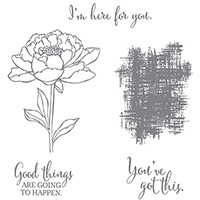
The next layer is a rectangle that has been stamped using the Watercolour Wash background stamp, that I spritzed with water before stamping, to dilute the ink and create a more diffuse background
Once dry, this was panel was overstamped using Black Stazon Ink & colour was added to the flower using First, the Blender Pen technique, followed by some sponging, and then finished using Stampin write markers to add depth and contrast to the flowers.
The sentiment label was created using the Decorative Label Punch
Continue reading below for a more detailed tutorial

And here are the products used to create today's card
Click om the product icon to view it in more details
 |  |  |  |  |
 |  |  |  |  |
 |  |  |  |  |
 |  |  |  |  |
 |

Here is how I created this card:
I began by making a 15 cm (6") square card base using Thicker Whisper White Cardstock for more structure to the card.
Next, I trimmed my choice of paper from the Timeless Elegance Designer Series Paper (DSP)
I chose one with fine lines and roses. I sponged the roses with Blushing Bride ink and the leaves with k.Pear Pizzazz in This was then mounted onto the card base using Fast Fuse Adhesive.
Next I trimmed a rectangle of Watercolour Paper and stamped it with the Watercolour Wash Background Stamp using Blushing Bride ink, and lightly spritzed the inked stamp with water before stamping onto the cardstock. Don't be too quick to lift the stamp, as you want the ink and water to soak into the Watercolour Paper. Allow to dry (this doesn't take long)
Once dry, stamp the Flower onto the Watercolour Paper using Black Stazon ink.
Lightly sponge additional colour to the flower using Blushing Bride ink. Allow the colour to diffuse outside the stamped lines. Do the same for the leaves, but with Pear Pizzaz ink.
Now for the blender pen
Take the Blushing Bride Ink pad, and transfer ink into the well (lid) by squeezing the ink so ink transfers from the ink pad to the ink well.
Now you can pick up ink from the well, using the blender pen, and add additional colour and definition to the flower and leaves, by building the colour, again using Blushing Bride and Pear Pizzazz inks. Allow to dry
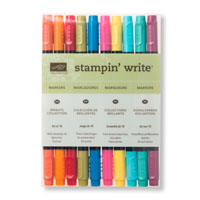
Your final treatment for this image, is to use Stampin Write Markers to create contrast to the flower
I used the Melon Mambo marker, from the Brights Stampin Write Marker assortment.
Apply Stampin Dimensionals to the back of this panel, and adhere it to the card base at a slight angle.

Now for the finishing touches
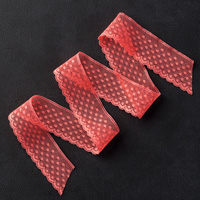
First, add some Watermelon Wonder Dotty Lace across the bottom edge f this panel.
Then stamp your sentiment using Black Stazon Ink, onto Whisper White cardstock.
Punch this out using the Decorative Label Punch.
Next, punch two more Decorative labels from Blushing Bride cardstock, and two from Pear Pizzazz Cardstock
Cut each of the PP & BB cardstock as follows:
The BB cardstock labels - cut one in half on the horizontal plane, and the other in half on the vertical plane.
Repeat the same with the PP cardstock.
Next, using small amounts of Tombow Multipurpose liquid glue, adhere the corresponding edges of the BB cardstock label to the back of the stamped label.
the finished effect is better if you adhere the long pieces first, and then the short pieces.
Repeat this process using the PP cardstock label, but this time adhere the corresponding pieces to the back of the BB cardstock,
This will give you a fab layered label.
Adhere Stampin Dimensionals to the back of the label.
Attach the label overlapping the Dotty Lace at the bottom of the card.
Add a few Basic Rhinestones, and a couple of In Colour Blossom Accents, and the card is complete.
Let me know how you get along, when you give these techniques a go!

Would like to JOIN my Pinterest Community
Board?
where you will be able to post your own
Stampin Up! Makes?
If the answer is YES
please email me via

If you have any
questions on techniques, orders, products
OR
Joining my Team as an Independent Stampin
Up! Demonstrator
contact me via:-
Email me: kim@stampinupatthewarren.com
Text: 07759587004 OR
Order Online 34/7
No comments:
Post a Comment