
Today is the final day of the Subtles Collection Designer Series Paper Stack Showcase,
and today is Scrap day.
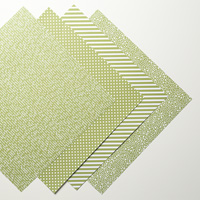
Yes, we are going to be using up all those scraps from the 2 sheets of 12" x 12" Wisteria Wonder and Blushing Bride DSP that has been used over this weeks cards/
And it is super easy with the use of the 1"squre punch.
And you are going to use both sides of the DSP to give you the range of colour and pattern seen in todays creation
The patchwork effect is slightly offset to give a brick work effect, but the DSP is more in keeping with fabrics used in Patchwork Quilt making.
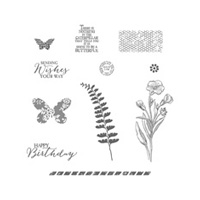
There is also some stamping on the central layer with the help of the Butterfly Basics Stamp Set, and the sentiment, is again from A Dozen Thoughts Stamp Set.
You will find the products used today listed below the first photo, just click on the product icons for more infomation.
Below that is the tutorial
I hope you have enjoyed this weeks postings,
It has been a challenge for me, as I so very rarely use Designer Series Papers,
but it is always nice to take a step outside of ones 'normal' box of creation

below are the products used today
 |  |  |  |  |
 |  |  |  |  |
 |  |  |  |  |
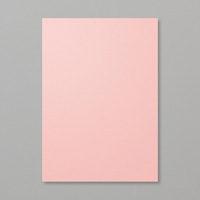 |  |  | 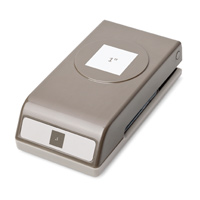 |
Table built using Product Table Builder by The Crafty Owl - Independent Stampin' Up! Demonstrator.

Begin by making your 6" square card base using Thicker A4 Whisper White Cardstock
Then trim a piece of Whisper White Cardstock to to 13 cms x 13 cms
Now punch out your scraps of DSP using the 1" squre punch.
Once you have punched enough to cover your piece of cardstock, start sticking them down the squares using some Tombow Glue, offsetting the start of each row so the squares overlap.
Once you have covered the cardstock and trimmed off any excess paper, Mat (Layer) the cardstock onto a piece of Blushing Bride Cardstock.
Mount this panel onto the cardbase
Next, trim a piece of Wisteriea Wonder Cardstock to a smaller panel to go in the centre of your card front. Round the corners (I used the corner punch on my Envelope Punch Board).
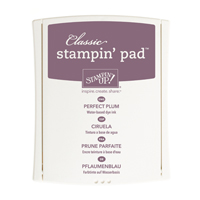
Now, stamp the panel with the Honeycomb stamp using Wisteria Wonder Classic Ink Pad for a tone on tone effect.
Then overstamp this with the Fern from Butterfly Basics Stamp Set, and then using 1st to 3rd generation stamping, also stamp a few of the postmark stamps using the Perfect Plum Classic Ink Pads for both.
Mat this onto a piece of Perfect Plum cardstock, that also has it's corners rounded.
Stamp your sentiment from A Dozen Thoughts Stamp Set using Perfect Plum Classic Ink Pad.
Mount this behind the Stamped panel.
Apply Stampin Dimensionals to the reverse, and attach to the centre of the card front at an angle.

Add some Heat Embossed Vellum Butterflies, punched out with the Elegant Butterfly Punch.
Embellish with some Basic Pearls and add a soft bow of Wisteria Wonder Seam Binding Ribbon.
And that is it ... Finito!!
No comments:
Post a Comment