
This is the first time I have used this Stamp Set, and I have to say, I am in LOVE
with the
TIMELESS LOVE
Stamp Set
The stamp set works beautifully with the Emboss Resist Technique
using Stampin Up's Classic Ink Pads and Stampin Sponges.
The cardstock is heat embossed with White Embossing Powder and the resist is highlighted using the Wisteria Wonder Classic Ink Pad for the background
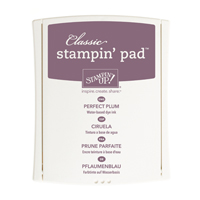
& the contrasting Sentiment label uses the same technique, but sponged with Perfect Plum Classic Ink Pad.

And below are the products used
You will note that the list of products is again, very small!!
 |  |  |  |  |
 |  |  |  |  |
 |  |  |  |  |
 | 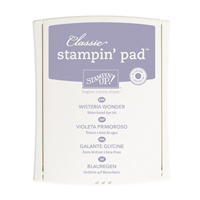 |
Table built using Product Table Builder by The Crafty Owl - Independent Stampin' Up! Demonstrator.

You will need to begin by creating your 6" square card base using the Thicker A4 Whisper White Cardstock by trimming a the cardstock to 25 cms x 30 cms
Score at 15 cms, fold and use your bone folder to create a nice crisp fold.
Put to one side.
Next, trim a regular piece of Whisper White Cardstock to 12 cms x 12 cms
Randomly stamp this panel with the floral stamp from Timeless Love stamp set using Versamark Ink Pad.
Dust with White Embossing Powder, shake off any excess powder and heat set with your Heat Tool.
Trim your stampin Sponge into 6 segments then ink up your sponge with Wisteria Wonder Ink from the Classic Ink Pad, remove some of the excess ink, and start sponging from the centre of the flowers, and blending the ink outward.. Add additional ink to the centre of the flowers according to your own taste and then ink all the edges of the panel.
Wrap around a piece of 5/8" Organza Ribbon and tie a soft bow.
Mat this onto a piece of Perfect Plum Cardstock measuring 12.4 cms x 12.4 cms
Now for the Sentiment
Stamp the Anniversary Stamp onto a scrap of Whisper White Cardstock using Versamark Ink Pad.
Dust with White Embossing Powder, remove the excess,
Heat set with your Heat Tool.
Sponge the sentiment with Perfect Plum Classic Ink Pad and a piece of Stampin Sponge.
Punch out the sentiment or use the Oval Framelits.
Ink the edges of the cardstock and mat onto a slightly larger oval of Perfect Plum cardstock.
Lauer up the label using Stampin Sponges, and mount the label close to the Bow.
Accessorise with a few Basic Pearls
And that is it!! job Done ...
This would also look fab as a Wedding Card.

Join my Pinterest community board,
where you can share your own Stampin Up Creations?
Follow the Pinterest Board on the left hand side
bar and I will send you an invitation to follow the Stampin Up! At The Warren
Community Pinterest Board
If you have any
questions on techniques or products, or Joining my Team/discussing the business
opportunities Stampin Up! Can offer
Contact Me
Or telephone/text
07759587004
Happy Stamping
Kim
xxx
Order your Craft
Supplies on line 24/7
http://www.stampinup.net/esuite/home/stampinupatthewarren/
No comments:
Post a Comment