
Today I have an aperture Card to share with you, and with the Autumn fast approaching, I felt the wonderful colours of the changing leaves come over me!
and as I sat beneath our magnificent Oak Tree in our Back Garden, foll of maturing acorns, and our goats leaning over as far as they could to try and get a few of the tender leaves, I decided to take my inspiration from what I could see,
I hope you like it?
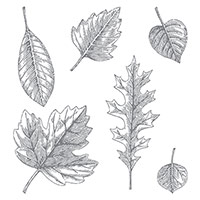
And what better stamp set to use,
VINTAGE LEAVES
I have gone with the autumnal colours of:
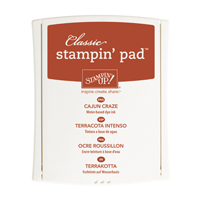
Cajun Craze
Crushed Curry
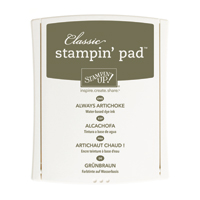
& Always Artichoke
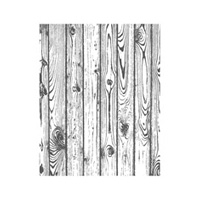
And these autumnal colours were set onto a backdrop of weathered wood.
The Hardwood Background Stamp is just amazing, and you can really play around with colour combinations.
Here, I used Early Espresso Classic Ink Pad onto Very Vanilla Cardstock, and then sponged on added colour with Sahara Sand Classic Ink Pad, and also a little crushed curry.
The circle Framelits dies are perfect for creating frames, as the circles dies are perfect nesties,
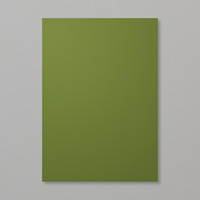
Once made, the card was mounted onto a Mossy Meadow Card Base

Before I get to the Tutorial
Below you will find all the products I have used in today's card
Just click on the product icons to view them in more detail, or place an order.
If you need any assistance, please contact me
kim@stampinupatthewarren,com
 |  |  |  |  |  |
 |  |  |  |  |  |
 |  |  |  |  |  |
 | 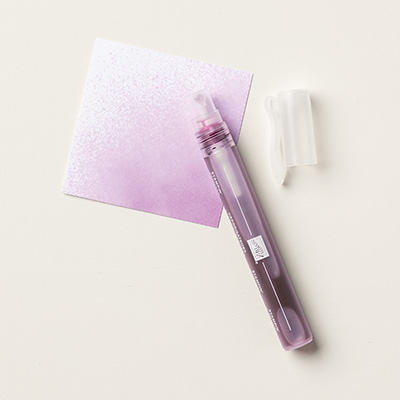 |
Table built using Product Table Builder by The Crafty Owl - Independent Stampin' Up! Demonstrator.
And now for the tutorial

Begin y making a 6" square card base using Mossy Meadow Cardstock
Next, trim two pieces of Very Vanilla Cardstock to 12 cms x 12 cms
Stamp Both of these panels with the Hardwood Stamp using Early Espresso Classic Ink Pad, and then distress the stamped image using a combination of Sahara Sand Classic Ink Pad and Crushed Curry Classic Ink Pad, using a Stampin Sponge.
Take one of the hardwood stamped panels, and die cut a large circle in the centre of the panel using the Circles Framelits, Use the Magnetic Platform for best results.
Now, add some stampin Dimensionals around the aperture, and one in each corner.
Mount this on top of the second Hardwood Stamped Panel.
Mount this onto your car base.
Next, you are going to need the circle die you used to make the aperture, as well as the next size up circle die.
Using the magnetic platform, place both circles face down onto the Crumb Cake cardstock, spacing them carefully, one inside the other, and run these through your Big Shot.
When you remove the die, you will be left with a frame for your aperture,
Add a few Stampin Dimensionals (you may need to cut them in half) to the back of the frame, and adhere in place on the card base.
Now for the leaves.
Stamp a selection of the leaves using the ink pads mentioned at the top of this post.
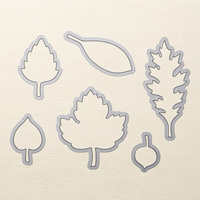
Die cut the leaves with the co-ordinating Leaflets Dies.
Once the ink has dried, fill your Stampin Spritzer with water, and spritz the leaves with water, and then scrunch the leaves in your hand, and carefully open the leaves up again.
Once dry, adhere the leaves inside the aperture using Stampin Dimensionals,
Finally, stamp your Sentiment from the AND MANY MORE stamp set using Early Espresso Classic Ink Pad, and punch it out using the Washi Label Punch. Attach to your card front.
And there it is!! All done .... now it is your turn, so please feel free to CASE away!!

Join my Pinterest
community board,
where you
can share your own Stampin Up Creations?
Follow the
Pinterest Board on the left hand side bar and I will send you an invitation to
follow the Stampin Up! At The Warren Community Pinterest Board
If you have any
questions on techniques or products, or Joining my Team/discussing the business
opportunities Stampin Up! Can offer
Contact Me
Or telephone/text
07759587004
Happy Stamping
Kim xxx
Order your Craft
Supplies on line 24/7
http://www.stampinup.net/esuite/home/stampinupatthewarren/
No comments:
Post a Comment