
Todays card has brought me a real trip down memory lane. So much so that I can even remember the smell of the flannel pajama's I used to wear as a young girl
Even the colour and pattern of the Designer Series Papers (DSP) remind me of a pair of PJ's I got for Christmas when I was very small!
So todays Christmas card makes me feel all warm and fuzzy
The great thing about Stampin Up!'s DSP packs, is that the papers are (in the main) double sided.
So in todays card, for example, I have used both sides of the DSP to create contrast.
There is also a little heat embossing, just because Christmas Cards just have to have a bit of embossing, don't they??

The card can be easily made in under 30 minutes
and you will find the tutorial a little further down today's blogpost.
And here are the products I have used today.
Click on the product icons below to view the details in more detail, or place your order
 |  |  |  |  |
 |  |  |  |  |
 |  |  |  |  |
 |
Table built using Product Table Builder by The Crafty Owl - Independent Stampin' Up! Demonstrator.

Begin by trimming a piece of Very Vanilla Cardstock to 12cms x 12 cms.
Using Versamark and the smallest single stamp from the Christmas Wishes Stamp Set, randomly stamp the cardstock.
Dust with White Embossing Powder, give a sharp rap on the back of the cardstock to remove any excess powder, and heat set the embossing using your Heat Tool.
Mat (layer) this onto a piece of Cherry Cobbler Cardstock measuring 12.2 cms x 12.2 cms
I find either Fast Fuse Adhesive OR tiny amounts of Tombow Multipurpose Liquid Glue Works best for this job.
Next, trim a piece of the Home For Christmas DSP to 12 cms x 12 cms and mat this onto another piece of Cherry Cobbler Cardstock measuring 12.2 x 12.2 cms
Now trim a piece of the opposite side of the Home For Christmas DSP to 3 cms x 12 cms
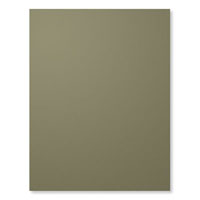
Mat this onto a piece of Always Artichoke Cardstock measuring 12.2 cms c 3.2 cms.
Mount this across the centre of the Heat Embossed panel using Fast Fuse Adhesive, or Tombow.
Apply Stampin Dimensionals to the reverse side of the DSP mounted panel, and mount this diagonally on top of the first panel.
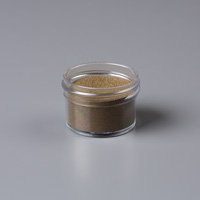
Stamp the sentiment shown from the Flurry of Christmas Wishes Stamp Set, using Versamark onto Very Vanilla Cardstock, dust with Gold Embossing Powder & heat set with your Heat Tool
Die Cut this using the Deco Labels Framelits Dies, and run through your Big Shot Die Cutting Machine, using the Magnetic Platform for best results.
Then using a scrap of Always Artichoke Cardstock, Die Cut the next size up Deco Label.
Apply Stampin Dimensionals to the reverse side of both labels. Add a strip of Fast Fuse across the middle of the back of the smaller label.
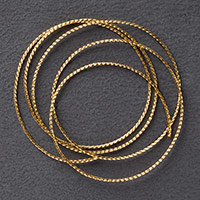
Roll up some Gold Cording Trim around your hand, and adhere to the strip of Fast Fuse Adhesive on the back of the label. You want the loops to be large enough to show once mounted. Stack the labels up and moumt the topper to the centre of the card front.
Mount onto a 6" square Card Base.
Now, before anyone else mentions it ... no, the cording in my card, is finer than the cording trim in the Seasonal Catalogue.
But if you follow my blog, you will know that I like to be resourceful, and at the last Stampin Up! Event I went to, I won a stamp set, and sime fine cording trim .... and that is what I have used on my card today.
Now it is your turn to have some crafting gun
Kim xxx
Using Versamark and the smallest single stamp from the Christmas Wishes Stamp Set, randomly stamp the cardstock.
Dust with White Embossing Powder, give a sharp rap on the back of the cardstock to remove any excess powder, and heat set the embossing using your Heat Tool.
Mat (layer) this onto a piece of Cherry Cobbler Cardstock measuring 12.2 cms x 12.2 cms
I find either Fast Fuse Adhesive OR tiny amounts of Tombow Multipurpose Liquid Glue Works best for this job.
Next, trim a piece of the Home For Christmas DSP to 12 cms x 12 cms and mat this onto another piece of Cherry Cobbler Cardstock measuring 12.2 x 12.2 cms
Now trim a piece of the opposite side of the Home For Christmas DSP to 3 cms x 12 cms
Mat this onto a piece of Always Artichoke Cardstock measuring 12.2 cms c 3.2 cms.
Mount this across the centre of the Heat Embossed panel using Fast Fuse Adhesive, or Tombow.
Apply Stampin Dimensionals to the reverse side of the DSP mounted panel, and mount this diagonally on top of the first panel.
Stamp the sentiment shown from the Flurry of Christmas Wishes Stamp Set, using Versamark onto Very Vanilla Cardstock, dust with Gold Embossing Powder & heat set with your Heat Tool
Die Cut this using the Deco Labels Framelits Dies, and run through your Big Shot Die Cutting Machine, using the Magnetic Platform for best results.
Then using a scrap of Always Artichoke Cardstock, Die Cut the next size up Deco Label.
Apply Stampin Dimensionals to the reverse side of both labels. Add a strip of Fast Fuse across the middle of the back of the smaller label.
Roll up some Gold Cording Trim around your hand, and adhere to the strip of Fast Fuse Adhesive on the back of the label. You want the loops to be large enough to show once mounted. Stack the labels up and moumt the topper to the centre of the card front.
Mount onto a 6" square Card Base.
Now, before anyone else mentions it ... no, the cording in my card, is finer than the cording trim in the Seasonal Catalogue.
But if you follow my blog, you will know that I like to be resourceful, and at the last Stampin Up! Event I went to, I won a stamp set, and sime fine cording trim .... and that is what I have used on my card today.
Now it is your turn to have some crafting gun
Kim xxx

JOIN my Pinterest Community Board?
Where you will be able to post your own
Stampin Up! Makes
Simply follow my
Community Pinterest Board
(See the left hand side
bar of this Blog)
And I will sent you
an invitation to start pinning
If you have any
questions on techniques, orders, products
OR
Joining my Team as an Independent Stampin
Up! Demonstrator
contact me via:-
Email me: kim@stampinupatthewarren.com
Text: 07759587004
Order Online 24/7
http://www.stampinup.net/esuite/home/stampinupatthewarren/
No comments:
Post a Comment