
Today is a day for sponging, masking, and heat embossing
And that is my idea of heaven. I LOVE having inky fingers that take days to wash off he he
But this aperture card is easier to make than you probably think.

Below you will find all the products you need to CASE (copy & paste everything) todays card.
Simply click on the product icon and it will take you straight to my online store, so you can place your order the items you need with ease
 |  |  |  |  |
 |  |  |  |  |
 |  |  |  |  |
 |  |  |  |  |
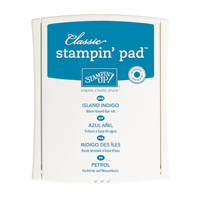 | 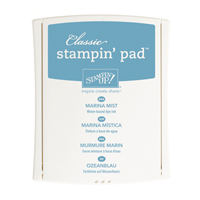 |
Table built using Product Table Builder by The Crafty Owl - Independent Stampin' Up! Demonstrator.
If you don't like ordering online, then contact me.

And here is the tutorial on how to make this:
- Begin by making your 6" square card base by trimming a piece of Thicker Whisper White Cardstock to 15cms x 30 cms. Score the long side at 15 cms. Fold along the score line and put aside to prevent contamination by inks.
- Trim a piece of Whisper White cardstock to 14 cms x 14 cms
- next you will need the following Classic Ink Pads - Marina Mist, Island Indigo, and Night of Navy. Take your Stampin Sponge, and cut it into 6 segments. Use a different segment for each ink pad. Start from the bottom edge of the cardstock, working upward. Using gentle circular motion, sponge the bottom 1/5 of the cardstock with the Marina Mist ink Pad, then change sponges, and sponge the next third of the panel with Island Indigo Classic Ink Pad, and finally, sponge the top third of the panel with Night of Navy Classic Ink Pad. Make sure you blend the inks where the colours merge.
- Next, create the aperture in the card front using the Deco Labels Framelits (the best fit for the cardstock) For best results use the Magnetic Platform when you run the cardstock & die through your Big Shot Die Cutting Machine.
- Now, die cut the next size up Deco Label Framelit using a piece of Whisper White Cardstock,.
- Stamp the Santa & his sleigh stamp from Cozy Christmas Stamp Set, onto this larger die cut label using Versamark Ink Pad and dust with White Embossing Powder, and heat set the embossing with your heat tool.
- Now to make a mask for the moon. Punch a circle using a Post It Note, ensuring you have some of the sticky remaining on the circle. Place the Mask where you want your moon to be on the larger Deco Label Die Cut.
- Sponge the the Die Cut label using the 3 inks from before (excluding the area where the mask is)
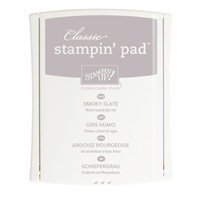
- Remove the mask and sponge a little Smokey Slate Ink where the 'moon' is. Wipe off any excess ink from the embossed areas using some kitchen towel.
- Apply some Stampin Dimensionals around the Aperture (on the back of the cardstock that is). Adhere the larger sponged Deco Label to the back of the Aperture. Ensuring Santa and his sleigh are fully, or partially visible in the aperture.
- Now heat emboss the Cabin on the card front using Versamark and White Embossing Powder in the same way as before.
- Next,stamp your sentiment from the Cozy Christmas Stamp Set using Versamark onto a piece of Island Indigo Cardstock, and heat emboss with White Embossing Powder as before, and Die Cut the label out using the best fit Deco Label Framelit. Apply a few Stampin Dimensionals to the reverse of the tag. and mount on the card front.
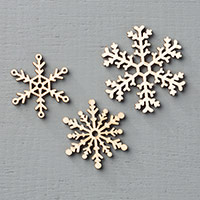
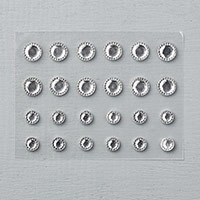
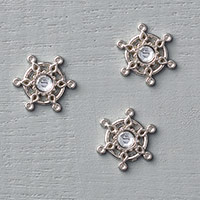
- Finally, the embellishments. Add a couple of Snow Flake Elements, a Winter Wonderland Embellishment, some coiled Gold Cording Trim & 3 iced Rhinestones.
- and the last job, is to add Stampin Dimensionals to the back of the card front, and adhere the panel to your card base using some Fast Fuse,

Join my Pinterest community board,
where you can share your own Stampin Up Creations?
Follow the Pinterest Board on the left hand side
bar and I will send you an invitation to follow the Stampin Up! At The Warren
Community Pinterest Board
If you have any
questions on techniques or products, or Joining my Team/discussing the business
opportunities Stampin Up! Can offer
Contact Me
Or telephone/text
07759587004
Happy Stamping
Kim
xxx
Order your Craft
Supplies on line 24/7
http://www.stampinup.net/esuite/home/stampinupatthewarren/
No comments:
Post a Comment