
For today's offering, we have the Wonderous Wreath
Now, I have a confession to make here
I purchased this returning favourite last year .... and never used it! I KNOW!!! Mad or What
and there it has sat, unseen and forgotten, until today I was looking for the Deco Labels (for another project) and realised that the Wonderous Wreath Die Pack had gotten itself stuck to a retire
Die pack ... hence how Wondrous Wreath had gotten overlooked.
Not least because I had forgotten I had ever ordered it, and was umming and aahing over purchasing this year .... thankfully, I found the set before placing the order.
And so this-afternoon, I had a great time getting up close and personal with the stamp set and Coordinating Dies.
 |  |  |  |  |
 |  |  |  |  |
 |  |  |  |  |
 |  |  |
Table built using Product Table Builder by The Crafty Owl - Independent Stampin' Up! Demonstrator.

You will find the products I used to make today's card below
Click on the product icons to view them in more detail or to place your order

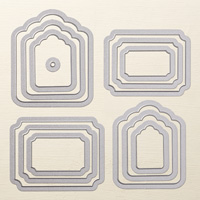
I began by creating the Night of Navy Panel Door using the Tags and Labels Framelits
I inserted a vintage Brad where the door knocker would be.
Die, layering them up to give a door appearance.
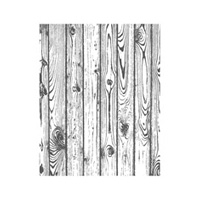
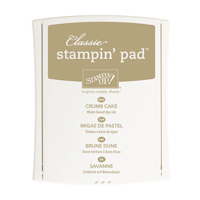
Next, I stamped some Whisper White Cardstock with the Hardwood Background Stamp using Soft Suede ink, and then sponged the cardstock with Crumb Cake ink.
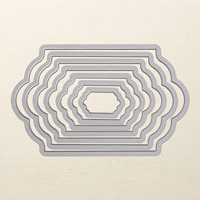
This panel, was then die cut using the Largest Lots of Labels Framelits.
Now for that Wonderous Wreath
This is a three step stamp set, and being photopolymer stamps, it is much easier to to line up the stamps without the use of masking techniques.
But Stampin Up! has added a further tool to help acurate placement,
There will be an arrow shaped tab that is in the same place with each of the 3 stamps that make up the wreath. Keep the tab in the same top right corner, and you will find it easier to line up the stamps and dies.
I used Mossy Meadow for the step one stamp., Old Olive for the Step 3 stamp, and cherry cobbler for the step 3 stamp.
Using the Magnetic Platform and your Big Shot, you can die cut both the outside of the wreath at the same time as die cutting the centre of the wreath.
Make a hole with your Paper Piercing Tool to thread through some gold cording trim and secure on the back of the Hardwood label.
Stamp & Die cut 9 Poinsetta's (using Cherry Cobbler Classic Ink Pad), and arrange these around the wreath using cut down pieces of Stampin Dimensionals for additional dimension.
Finally for the label.
Stamp the Cozy Christmas (from the stamp set of the same name) using Night of Navy Classic Ink Pad, onto a 1cm wide piece of Whisper White Cardstock.
Using the Word Window Punch, you can create your label to be as long as you need by inserting the cardstock in through the top of the punch, and guide the cardstock between the cutting plates of the punch, and punch. Rotate the label by 180 degrees and repeat.
Layer up using Stampin Dimensionals and add to your card front,
Mount the card front onto your A6 Card Base,
Finish by adding a wooden Snowflake Element.
& there you have it!

Join my Pinterest community board,
Where you can share your own Stampin Up Creations?
Follow the Pinterest Board on the left hand side
bar and I will send you an invitation to follow the Stampin Up! At The Warren
Community Pinterest Board
If you have any
questions on techniques or products, or Joining my Team/discussing the business
opportunities Stampin Up! Can offer
Contact Me
Or telephone/text
07759587004
Happy Stamping
Kim
xxx
Order your Craft
Supplies on line 24/7
http://www.stampinup.net/esuite/home/stampinupatthewarren/
No comments:
Post a Comment