

Below you will find the products used to create today's card,
Click on the product image to view or order the item via my online store
 |  |  |  |  |  |  |
 |  |  |  |  |  |  |
 |
Table built using Product Table Builder by The Crafty Owl - Independent Stampin' Up! Demonstrator.
Tutorial
- Make your card base by trimming a piece of Thicker Whisper White Cardstock to 14.8 cms x 21 cms; Score the long side at 10.5 cms; fold along the score line and burnish with a bone folder
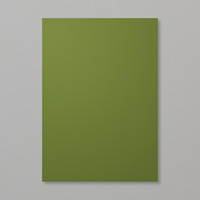
- Trim a [piece of Whisper White Cardstock to to 14 cms x 9.7 cms; Randomly stamp with the snowflake stamp in the Wonderland Stamp Set & your Christmas Sentiment using Mossy Meadow Cardstock; Sponge the panel using a wedge of Stampin Sponge and Mossy Meadow Classic Ink Pad
- Mat (layer) the stamped panel onto a piece of Mossy Meadow Cardstock measuring 14.4 cms x 10.1 cms
- Mount the panel onto your Card Front using Fast Fuse or Tombow Adhesive
- Trim a panel of Whisper White Cardstock to 3 cms x 9.7 cms; stamp the panel using the Antler stamp and the Soft Suede classic Ink Pad & Mossy Meadow Classic Ink Pad; sponge with Mossy Meadow ink. Apply fast fuse or Tombow Adhesive to the back, and mount along one edge of the cardstock.
- Trim another piece of Whisper White Cardstock to 3 cms x 9.7 cms; randomly stamp with the branch and snowflake stamps; sponge the edges of the panel & Mat onto a piece of Mossy Meadow Cardstock measuring 3.6 cms x 14.4 cms; Apply some Stampin Dimensionals to the back of the panel
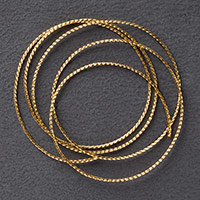
- Wrap some Gold Cording Trim around 2 fingers 3 or 4 times and secure the lower section of the coiled trim onto the back of the panel using some Fast Fuse Adhesive; Mount the panel across the centre of the card
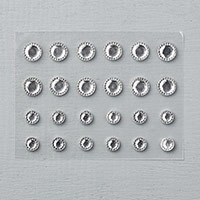
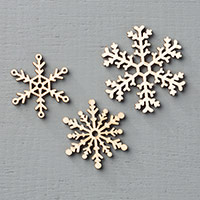
- Add a couple of Snowflake Elements using a Stampin Dimensional to the back of the snowflake, and top with an Iced Rhinestone
I would love to see your own creations, and you will find details below on my various social media accounts where you are welcome to share your papercraft makes
And here is the supporting How To Video

JOIN my Pinterest Community Board
Where you will be able to post your own
Stampin Up! Makes
Simply follow my
Community Pinterest Board
And I will sent you
an invitation to start pinning
If you have any
questions on techniques, orders, products
OR
Joining my Team as an Independent Stampin
Up! Demonstrator
contact me via:-
Email me: kim.tolton@googlemail.com
Text: 07759587004
Order Online 24/7
Stamping @ The Warren Craft Forum:
Pinterest:
Google +
Facebook:
Twitter:
Instagram:
@kim.tolton
LinkedIn:
No comments:
Post a Comment