
Welcome back to another day of the Quick and Simple Christmas Cards that I am featuring this week. They are all suited to anyone from Novice to Expert and anywhere in between
The Holly Jolly Greetings Stamp Set is fabulous as it gives you a variety of Christmas Sentiments and varies sizes of these, A Great stamp set for your crafting stash ...
I have also used a Die Cut Christmas Sentiment from Night of Navy Cardstock to add dimension and interest
As always, there is a Video Tutorial included in today's post, plus written instructions to go alongside the video. I do try not to rush my dialogue, but appreciate it may be too fast for some, or you may prefer to read the instructions, so I just include everything and you can pick and chose'

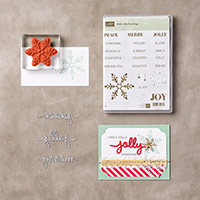
Below you will find the product icons for the items I used to create this really truly quick and easy card.
Click on the product icons to view or order them via my Demonstrator Website


WATCH THE VIDEO BELOW
- Make your card base using a piece of Thicker Whisper White Cardstock & trim to 21 cms x 14.8 cms; Score the long side at 10.5 cms; fold & burnish, put to one side
- Trim a piece of Regular Whisper White Cardstock to 14.4 cms x 10.1 cms
- Using Mint Macaron Classic Ink Pad, stamp the large snowflake from Holly Jolly Greetings Stamp Set, in the centre of the cardstock
- Use the teeny stars and snowfall stamp from the same stamp set, again using Mint Macaron Ink Pad, and create a halo of the stamped image only re-inking after you have stamped three times (third generation stamping)
- Using Soft Suede, stamp the WISHING YOU stamp to the top third of the cardstock, and the ON EARTH to the bottom third of the cardstock
- Die cut the PEACE Christmas Greeting, & adhere across the snowflake using the Fine Tip Glue Pen
- Apply Stampin Dimensionals to the back of the cardstock and mount onto your card base

Kim Tolton, Independent Stampin Up
Demonstrator.
Card & Papercraft Tutorials
Please feel free to comment below,
and ask away with any questions. You can also find me via the links below
Blog:
Online Store:
Stamping @ The Warren
Craft Forum:
Email:
Pinterest:
Google +
Facebook:
Twittert:
Instagram:
@kim.tolton
LinkedIn:
No comments:
Post a Comment