

Below you will find all the products used to create today's Gift Box & Tag
Click on the product icons to view or order them via my online Demonstrator Website
 |  |  |  |  |  |  |
 |  |  |  |  |  |  |
 |  |  |  |  |  |  |
 |  |  |  |  |  |
Table built using Product Table Builder by The Crafty Owl - Independent Stampin' Up! Demonstrator.
Watch the Video Below- Trim a piece of Real Red Cardstock to 25.5 cms x 25 cms (11" x 10")l
- With the longer side at the top of the Metric Scoring plate, score at 6; 12; 18; 24 cms
- Rotate by 45 degrees, and score the short side at 1, 5.5; 21 cms
- Inches - with imperial scoring tool; score the long side at 2.5"; 5"; 7.5"; 10"
- Rotate by 45 degrees and with the short side at the top of the board, score at 1 3/4"; 7 3/4"; 9 3/4"
- Fold and burnish all score lines
- notch out the bottom tabs along the long side using Paper Shears
- Run a piece of Tear & Tape Adhesive down the long thin tab and stock the 2 ends together.
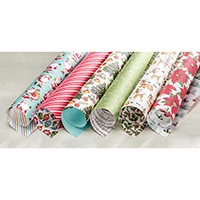
- Trim 4 pieces of Home For Christmas Designer Series Paper tp 5.5 cms x 3.6 cms & adhere to central panels of the box using Tombow
- Add a couple of pieces Tape & Tear Adhesive to one of the base tabs and fold in the base tabs, securing the one with the adhesive last
- Gently squeeze the top section of the box together as shown in the video, and punch a hole in each end of the top of the box
- Thread with Very Vanilla Satin Ribbon & tie a bow.
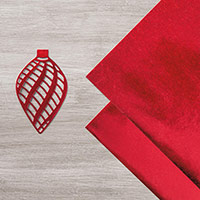
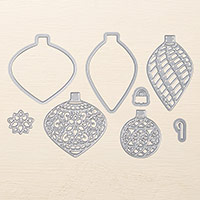
- Die cut a Delicate ornament using the Precision Base Plate with your Big Shot, and Red Foil Sheets
- Die cut 2 Bauble Toppers using Silver Foil Sheet & the Precision Plate with your Big Shot
- Die cut another two plain ornaments from Thick Whisper White Cardstock,
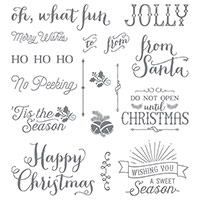
- Stamp one ornament with the Happy Christmas stamp from Oh What Fun Stamp Set using the Early Espresso Classic Ink Pad
- Mount the die cut delicate ornament onto the other plain ornament tag using the Fine Tip Glue Pen.
- Top the outside of both tags with the die cut toppers, using cut down Stampin Dimensionals
- Thread some Thick Cherry Cobbler Bakers Twine through both die cut ornaments, and tie around the Satin bow

Contact me or leave a comment
Kim Tolton, Independent Stampin Up
Demonstrator.
Card & Papercraft Tutorials
Please feel free to comment below,
and ask away with any questions. You can also find me via the links below
Blog:
Online Store:
Stamping @ The Warren
Craft Forum:
Email:
Pinterest:
Google +
Facebook:
Twittert:
Instagram:
@kim.tolton
LinkedIn:
No comments:
Post a Comment