
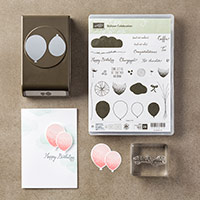
Today's card brings back the Balloon Celebration Stamp Set with co-ordinating Punch
But here is the best thing .... Drum Roll Please ....
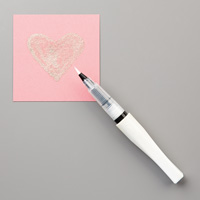
Stampin Up! Now has the Wink of Stella Glitter Glue Pens
If you have already used them, you will already be a convert, but if you haven't, you just don't know what you are missing out on!
They come in Clear and Gold, and they are the most pearlescent , mother of pearly fine glitter glue pens, with the softest of brushes. allowing for complete control of where you do, and more importantly, where you do not want glitter

- As you scroll down today's
blog post, you will find :
- icons of all the products
used to create today's card - click on them to visit my online store;
- A Video Tutorial
- & a typed tutorial
Feel free to CASE any of my creative
projects (Copy & Paste Everything)
Click on the icons below to view/order
any of the products used in today's tutorial
 |  |  |  |  |  |
 |  |  |  |  |  |
 |  |  |  |  |
Table built using Product Table Builder by The Crafty Owl - Independent Stampin' Up! Demonstrator.
Watch the Video Below
Tutorial
1. Trim a piece of
Thicker Whisper Cardstock to 21 x 14.8 cms; score the long side at 10.5 cms; fold and burnish (Card Base)
2. Trim a piece of regular Whisper White Cardstock measuring 14 x 9.7 cms
3. Stamp a sky background using the cloud stamp in Soft Sky classic ink pad.
Now for the three Step Stamping:
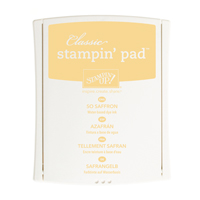
(a) Begin with the small balloon outline stamp, & Stamp 4 x using the Blushing Bride Classic Ink Pad; & 3 times using the So Saffron Classic Ink Pad
(b) Next, stamp the solid small balloon stamp and over stamp the outlines using the same ink pads in step (a)
(c) Now over-stamp the balloons using the small half balloon stamp with lots of fine dots; again using the same two ink pads.
4. Before punching out the balloons, add a fine layer of glitter using the Wink of Stella pen. This will only take a few moments to dry
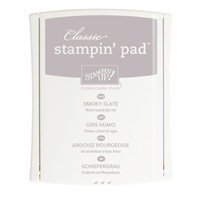
5. Stamp your sentiment in the bottom right corner of the cardstock using Smokey Slate Classic Ink Pad
6. Punch out the balloons using the Balloon Punch
7. Arrange your balloons over the stamped sky background, using a combination of Fast Fuse (or tombow) and Stampin Dimensionals (the Stampin Dimensionals will pop up some of the balloons for added interest.)
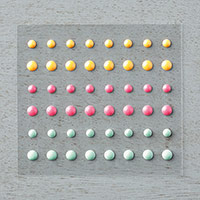
8. If you want a little embellishment add a few 'Its My Party' Enamel Dots.
(a) Begin with the small balloon outline stamp, & Stamp 4 x using the Blushing Bride Classic Ink Pad; & 3 times using the So Saffron Classic Ink Pad
(b) Next, stamp the solid small balloon stamp and over stamp the outlines using the same ink pads in step (a)
(c) Now over-stamp the balloons using the small half balloon stamp with lots of fine dots; again using the same two ink pads.
4. Before punching out the balloons, add a fine layer of glitter using the Wink of Stella pen. This will only take a few moments to dry
5. Stamp your sentiment in the bottom right corner of the cardstock using Smokey Slate Classic Ink Pad
6. Punch out the balloons using the Balloon Punch
7. Arrange your balloons over the stamped sky background, using a combination of Fast Fuse (or tombow) and Stampin Dimensionals (the Stampin Dimensionals will pop up some of the balloons for added interest.)
8. If you want a little embellishment add a few 'Its My Party' Enamel Dots.
How to Contact or Follow Me
Kim Tolton,
Independent Stampin Up Demonstrator.
Card & Papercraft
Tutorials
Please feel free to
comment below, and ask away with any questions. You can also find me via the
links below
Blog:
Online Store:
Stamping @ The Warren
Craft Forum:
Email:
kim.tolton@googlemail.com
youTube
Pinterest:
Google +
Facebook:
Twittert:
Instagram:
@kim.tolton
LinkedIn:
No comments:
Post a Comment