
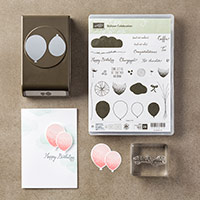
Today I am sharing a card that uses once of Stampin Up!'s Bundles, giving you a 15% saving on the purchase price, should you order the Balloon Celebration stamp set and the Balloon Punch Separately. This bundle would cost £45 meaning you would also qualify for a free Sal A Bration product. In the list of products used today a little further down today's post, I have included the Flowering Fields Stamp Set as your Freeby, but should you place an order, you would, of course, be free to chose a Free SAB product with every £45 you spend (excluding postage costs)
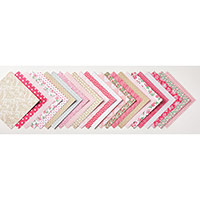
Me being me, I have used more than just the Bundle mentioned. I decided that rather than stamping the balloons, I decided it would be fun to punch out the balloons using a combination of Cardstock and Glimmer Paper. So I went with Blushing Bride Cardstock and Glimmer Paper, and Dazzling Diamonds Glimmer Paper.
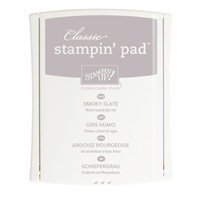
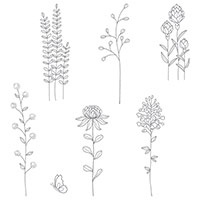
The background is stamped using stamps from the Balloon Celebration stamp set and Smokey Slate Classic Ink Pad. The balloon strings and the sentiment are stamped using Early Espresso Classic Ink Pad, with a little Love Blossoms Designer Series Paper (DSP).

- As you scroll down today's
blog post, you will find :
- icons of all the products
used to create today's card - click on them to visit my online store;
- A Video Tutorial
- & a typed tutorial
Feel free to CASE any of my creative
projects (Copy & Paste Everything)
Click on the icons below to view/order
any of the products used in today's tutorial


Watch the Video Below
Tutorial
1. Trim a piece of Thicker Whisper White Cardstock to 10" x 5"; score the long side at 5"; fold and burnish
2. Trim a piece of regular Whisper White Cardstock to 11.6 x 11.6 cms
3, Using the Smokey Slate Classic Ink Pad,randomly stamp the cardstock with the circular stamp, re-inking after stamping 2 or 3 times.
4. Repeat this process with the Pollen stamp, again using Smokey Slate ink pad.
5. Using the Early Espresso Classic Ink Pad, stamp the balloon strings stamp at an angle.
6. Mat the panel onto a piece of Blushing Bride cardstock measuring 12 x 12 cms using Fast Fuse or Tombow Adhesive
7. Mat that onto a piece of Early Espresso Cardstock measuring 12.4 x 212.4 cms using Fast Fuse/Tombow
8. Punch a large balloon from Blushing Bride Cardstock,; then 2 small balloons, one each of Blushing Bride and Dazzling Diamonds Glimmer Paper.
9. Attach the large balloon over the strings image using Fast Fuse; sightly overlap this with the Dazzling Diamonds balloon, again with Fast Fuse/Tombow, and finally, add a couple of Stampin Dimensionals to the back of the Blushing Bride Glimmer Balloon and mount overlapping the other 2 balloons.
10. Trim a piece of Love Blossoms DSP to 11.6 x 1.5 cms and mount along the top of the stamped cardstock using some Tear & Tape adhesive.
Trim a piece of Whisper White Cardstock to 11.6 x 1 cms & stamp with the sentiment using Early Espresso ink; create banner ends using the Banner Punch, an mount on top of the DSP strip using Tear & Tape adhesive.
- How to Contact or Follow Me

Kim Tolton, Independent
Stampin Up Demonstrator.
Card & Papercraft
Tutorials
Please feel free to
comment below, and ask away with any questions. You can also find me via the
links below
Blog:
Online Store:
Stamping @ The Warren
Craft Forum:
Email:
kim.tolton@googlemail.com
youTube
Pinterest:
Google +
Facebook:
Twittert:
Instagram:
@kim.tolton
LinkedIn:
No comments:
Post a Comment