
The example I have given you in the photo's for today's blog have been changed for a White on White Version in the Video that accompanies today's blog post. It is otherwise identical
It is then up to you which version you like best.
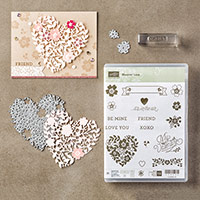
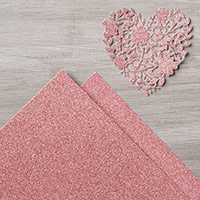
I do love the Blushing Bridge Glimmer Paper Version, but there is also something stylish and sublime about the white on white.
Let me know which version you prefer
The main focus of today, is to de-mystify some of the terms I commonly use when stamping, and these are:
Stamping Off
Random Stamping
2nd (or more) Generation Stamping
&
Stamping Off The Page
And all four of these techniques have been used to create the background for today's card
Watch the video for the full tutorial

- As you scroll down today's blog post, you will find :
- icons of all the products used to create today's card - click on them to visit my online store;
- A Video Tutorial
- & a typed tutorial
Feel free to CASE any of my creative projects (Copy & Paste Everything)
Click on the icons below to view/order any of the products used in today's tutorial
 |  |  |  |  |  |
 |  |  |  |  |  |
 | 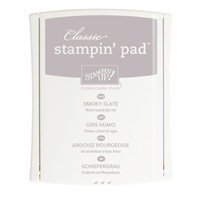 |  |
Table built using Product Table Builder by The Crafty Owl - Independent Stampin' Up! Demonstrator.
Watch the Video Below
Tutorial
1. Trim a piece of Thicker Whisper Cardstock to 10" x 5 "; score the long side at 5", fold & burnish
2. Using Smoky Slate Classic Ink Pad, use a combination of all four techniques
mentioned at the top of today's blog post. (watch the video)
2. Using Smoky Slate Classic Ink Pad, use a combination of all four techniques
mentioned at the top of today's blog post. (watch the video)
Stamping Off
Random Stamping
2nd (or more) Generation Stamping
&
Stamping Off The Page
3. Die cut the Bloomin Heart using Thicker Whisper White Cardstock and the following Big Shot Sandwich:
Multi-purpose Platform
Acrylic Cutting Plate
Cardstock
Wax Paper
Die
Precision Plate
If your Big Shot is well used, you may need to use a couple of sheets of Cardboard as a Shim
4. Remove the die front the cardstock gently. Flick your fingers against the back of the die cut to remove most of the small pieces of cardstock ... you may need your paper piecing tool to remove any tiny stubborn pieces.
5. Apply a Stampin Dimensional to the back of the die cut, on each of the 4 solid flowers, mount onto your card front.
6. Die cut one of each small flower dies in the pack using Dazzling Diamonds Glimmer Paper (use the same 'sandwich'). and attach to the card front using Stampin Dimensionals, and add a Basic Rhinestone to the centre of each
7. Stamp the banner from the stamp set using Smoky Slate Classic Ink Pad, and then stamp the sentiment onto this. Die cut with the co-ordinating die in the pack.
8. Finish with a Wink of Stella Clear Glitter Glue to give added shimmer
8. Finish with a Wink of Stella Clear Glitter Glue to give added shimmer

How to Contact or Follow Me
Kim Tolton, Independent Stampin Up Demonstrator.
Card & Papercraft Tutorials
Please feel free to comment below, and ask away with any questions. You can also find me via the links below
Blog:
Online Store:
Stamping @ The Warren Craft Forum:
Email:
kim.tolton@googlemail.com
youTube
Pinterest:
Google +
Facebook:
Twittert:
Instagram:
@kim.tolton
LinkedIn:
No comments:
Post a Comment