
The card I am sharing with you today is another Wedding Invitation, but could be used for any event invitation. I have coupled 3 stamp sets:
GROOVY LOVE
GORGEOUS GRUNGE
&
POSTCARD (now retired)
The postcard stamp is one of my all time Favourites, so will stay with me indefinitely, along with my En Francais background stamp .... along with a good few others he he
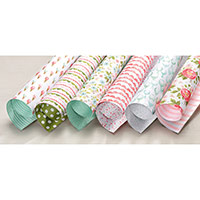
I added an extra dimension by using the Birthday Blooms Designer Series Paper (DSP) Pack, and co-ordinated the ink pads, with the DSP
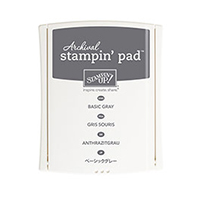
Mint Macaron & Basic Grey
The sentiment comes from the Hostess Stamp Set - AND MANY MORE
and I have used the Banner Punch to create the label

- As you scroll down today's
blog post, you will find :
- icons of all the products
used to create today's card - click on them to visit my online store;
- A Video Tutorial
- & a typed tutorial
Feel free to CASE any of my creative
projects (Copy & Paste Everything)
Click on the icons below to view/order
any of the products used in today's tutorial
 |  |  |  |  |  |
 |  |  |  |  |  |
 |  |  |
Table built using Product Table Builder by The Crafty Owl - Independent Stampin' Up! Demonstrator.
Watch the Video Below
Tutorial
1. Trim a piece of
Thicker Mint Macaron Cardstock to 14.8 x 10.5 cms
2. Trim a piece of the Birthday blossoms DSP to 14.4 x 10.1 cms * Mat (layer) onto the Mint Macaron DSP
3. Trim a piece of Whisper White Cardstock to 13.6 x 9.3 cms & Stamp with the Postcard Stamp using Basic Grey Ink Pad
4. Using the Line stamp from Gorgeous Grunge and a combo of the Basic Grey & Mint Macaron Classic Ink Pads, stamp using 1st to 3rd generation stamping technique
5. Using the Mint Macaron ink pad, stamp the small smudge stamp a few times without re-inking
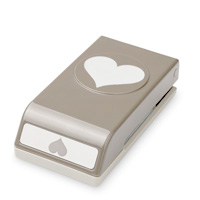
6. On a scrap of Whisper White Cardstock, sselect 2 of the heart stamps from the Groovy Love Stamp Set, and stamp one in Basic Grey and the other in Mint Macaron; punch them out using the Sweetheart Punch
7. stick one heart onto the stamped card front using Fast Fuse or Tombow, Pop the second heart up using Stampin Dimensionals
8. Trim a strip of Whisper white Cardstock to 1.5 cms wide; stamp the CELEBRATE stamp from the And Many More Stamp Set, and create banner ends by inserting the stamped strip in through the top of the Banner Punch and guide it between the cutting plates, move the cardstock through until it is within a few millimeters of the sentiment, and punch. Rotate by 180 degrees and repeat with the other end; apply Stampin Dimensionals to the back of the label and mount onto your card front.; Mount onto your Card Base
9. All that remains is for you to print your Save The Date information onto an A4 sheet of Whisper White Cardstock (yes it goes through a printer OK) and trim down to 14.4 x 10.1 cms and mount on the back of the postcard.
2. Trim a piece of the Birthday blossoms DSP to 14.4 x 10.1 cms * Mat (layer) onto the Mint Macaron DSP
3. Trim a piece of Whisper White Cardstock to 13.6 x 9.3 cms & Stamp with the Postcard Stamp using Basic Grey Ink Pad
4. Using the Line stamp from Gorgeous Grunge and a combo of the Basic Grey & Mint Macaron Classic Ink Pads, stamp using 1st to 3rd generation stamping technique
5. Using the Mint Macaron ink pad, stamp the small smudge stamp a few times without re-inking
6. On a scrap of Whisper White Cardstock, sselect 2 of the heart stamps from the Groovy Love Stamp Set, and stamp one in Basic Grey and the other in Mint Macaron; punch them out using the Sweetheart Punch
7. stick one heart onto the stamped card front using Fast Fuse or Tombow, Pop the second heart up using Stampin Dimensionals
8. Trim a strip of Whisper white Cardstock to 1.5 cms wide; stamp the CELEBRATE stamp from the And Many More Stamp Set, and create banner ends by inserting the stamped strip in through the top of the Banner Punch and guide it between the cutting plates, move the cardstock through until it is within a few millimeters of the sentiment, and punch. Rotate by 180 degrees and repeat with the other end; apply Stampin Dimensionals to the back of the label and mount onto your card front.; Mount onto your Card Base
9. All that remains is for you to print your Save The Date information onto an A4 sheet of Whisper White Cardstock (yes it goes through a printer OK) and trim down to 14.4 x 10.1 cms and mount on the back of the postcard.

How to Contact or Follow Me
Kim Tolton,
Independent Stampin Up Demonstrator.
Card & Papercraft
Tutorials
Please feel free to
comment below, and ask away with any questions. You can also find me via the
links below
Blog:
Online Store:
Stamping @ The Warren
Craft Forum:
Email:
kim.tolton@googlemail.com
youTube
Pinterest:
Google +
Facebook:
Twittert:
Instagram:
@kim.tolton
LinkedIn:
No comments:
Post a Comment