
Today I am showcasing this fabulous Collage two step Stamp Set from the new Spring/Summer Catalogue from Stampin Up!
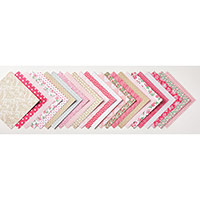
In keeping with the collage style of this card, I have used a combination of both In Colour Collections to show how well the colours work with one another
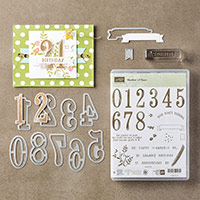
These beautiful number dies are just what was needed to help me with all the wedding, birthday and Anniversary celebrations we have coming up this year

- As you scroll down today's
blog post, you will find :
- icons of all the products
used to create today's card - click on them to visit my online store;
- A Video Tutorial
- & a typed tutorial
Feel free to CASE any of my creative
projects (Copy & Paste Everything)
Click on the icons below to view/order
any of the products used in today's tutorial
 |  |  |  |  |  |  |
 |  |  |  |  |  |  |
 |  | 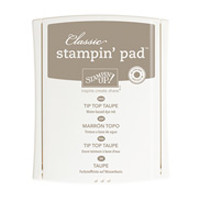 |  |  |  |
Table built using Product Table Builder by The Crafty Owl - Independent Stampin' Up! Demonstrator.
Watch the Video Below
Tutorial
1. Trim a piece of
Thicker Whisper Cardstock to 21 x 14.8 cms; score the long side at 10.5 cms; fold & Burnish
2. Trim a piece of Love Blossoms Designer Series Paper Stack to 14.4 x 10.1 cms & adhere to the from of your card base
3. Trim a piece of Whisper White Cardstock to 8.5 x 10.5 cms - this is the card you will be stamping on
4 use a combination of the ink pads (shown below) and the floral stamps to create the collage fro your card toper
5. Die cut the numbers for your card using the large thinlits dies and scraps of Mint Macaron Cardstock. Use the Magnetic Platform for best results
6. Add some glitter to the letters using the clear Wink of Stella Glitter Glue Pen. Once dry, use some trimmed down pieces of Stampin Dimensionals to pop up those numbers when you stock them to the card front.
Finish by stamping the label and sentiment using Tip Top Taupe Classic Ink Pad, and die cut using the banner die in the Large Letters Thinlits Dies pack. Mount this onto the topper.
7. Finally, add stampin dimensionals to the back of the topper and mount toward the top section of the card base.

How to Contact or Follow Me
Kim Tolton,
Independent Stampin Up Demonstrator.
Card & Papercraft
Tutorials
Please feel free to
comment below, and ask away with any questions. You can also find me via the
links below
Blog:
Online Store:
Stamping @ The Warren
Craft Forum:
Email:
kim.tolton@googlemail.com
youTube
Pinterest:
Google +
Facebook:
Twittert:
Instagram:
@kim.tolton
LinkedIn:
No comments:
Post a Comment