
Today I have a Wedding Congratulations Card To Share with you all, and I have used one of my favourite colours ... Blackberry Bliss. And I have gone with a monotone colour scheme to make that sentiment really pop
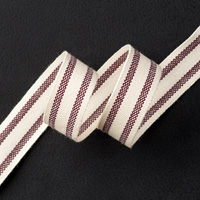
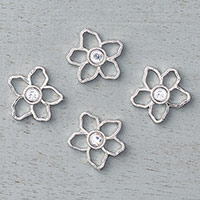
I have substituted the ribbon in the products list below, as the one I have used here has now retired, but I prefer the new Striped Cotton Ribbon, and I have ordered it, but it didn't arrive in time to use it for today's tutorial. But I am sure to share it with you in another project. A little sparkle has been added with some Basic Rhinestones and a Botanical Garden Jewel. This is a metal Flower with an inset Rhinestone ... they are really pretty. You may also notice that I have snuck in a Tea Lace Doily .... well, I just HAD to ha ha
I have substituted the ribbon in the products list below, as the one I have used here has now retired, but I prefer the new Striped Cotton Ribbon, and I have ordered it, but it didn't arrive in time to use it for today's tutorial. But I am sure to share it with you in another project. A little sparkle has been added with some Basic Rhinestones and a Botanical Garden Jewel. This is a metal Flower with an inset Rhinestone ... they are really pretty. You may also notice that I have snuck in a Tea Lace Doily .... well, I just HAD to ha ha

______________________________________________________________________________
- As you scroll down today's
blog post, you will find :
- icons of all the products
used to create today's card - click on them to visit my online store;
- A Video Tutorial
- & a typed tutorial
Feel free to CASE any of my creative
projects (Copy & Paste Everything)
Click on the icons below to view/order
any of the products used in today's tutorial


Watch the Video Below
Tutorial
1. Trim a piece of
Thicker Whisper Cardstock to 30 x 15 cms (6" card blank); Score the long side at at 15 cms; fold & Burnish
2 Trim a piece of Whisper White Cardstock to 13 cms square; Using Blackberry Bliss Ink Pad, stamp several hearts from the Groovy Love Stamp Set, using 1st to 5th Generation Stamping (the amount of times you stamp before re-inking the stamp),
3. Next, using the same ink pad and the flourish stamp from the At First Sight Stamp Set, stamp a flourish top and bottom, stamping off the page (i.e. not all the is on the cardstock)
4. Mat (layer) onto a piece of Blackberry Bliss Cardstock measuring 13.4 x 13.4 cms
5. Run a strip of Tear & Tape Adhesive along a piece of Blackberry Bliss Striped Ribbon, and attach to the cardstock at an angle, wrapping the ends onto the back of the panel. Mount onto your Card Blank
6. Adhere a Tea Lace Doily to the centre of your card front.
7. Using Basic Black Ink Pad, stamp the sentiment from the For The New Two Stamp Set, onto a piece of Whisper White Cardstock & Die Cut using the best fitting Circle Thinlets Die; Then die cut the next size up Circle Framelet from Blackberry Bliss Cardstock ; apply Stampin dimensionals to the back of both circles and layer them up, and attach on top of the Tea Lace Doily
8. Finish with a Botanical Garden Jewel using a couple of Glue Dots, plus some Basic Rhinestones.

How to Contact or Follow Me
Kim Tolton,
Independent Stampin Up Demonstrator.
Card & Papercraft
Tutorials
Please feel free to
comment below, and ask away with any questions. You can also find me via the
links below
Blog:
Online Store:
Stamping @ The Warren
Craft Forum:
Email:
kim.tolton@googlemail.com
youTube
Pinterest:
Google +
Facebook:
Twittert:
Instagram:
@kim.tolton
LinkedIn:
No comments:
Post a Comment