
Today's project, is one I adore. I just LOVE this Designer Series Paper Pack from Stampin Up! It is SO vintage and SO me! I love that all the papers are double sided allowing for great co-ordination and contrast using just the one paper pack. The Card on the right uses the reverse side of the roses paper to contrast with the rose panel.
The card on the left, shows how adding some sponged colour to the roses, allows you to use just the one side of the paper, by having one panel sponged, and the other not. I have made that panel Pop Up by matting (layering) the DSP onto Whisper White Cardstock, rather than the base colour of the DSP (i.e. Very Vanilla). The card was finishes simply, by using the co-ordinating In Colour Blossom Accent, a lush little resin flower. Chrystal Effects is the perfect adhesive to attach this to the card front.
Remember that you can share your card makes via my social media accounts below. And by Following My Stamping At The Warren Community Pinterest Board, you can receive an invitation to join the board and start sharing your own projects there.

- As you scroll down today's
blog post, you will find :
- icons of all the products
used to create today's card - click on them to visit my online store;
- A Video Tutorial
- & a typed tutorial
Feel free to CASE any of my creative
projects (Copy & Paste Everything)
Click on the icons below to view/order
any of the products used in today's tutorial


Tutorial
1. Trim a piece of
Thicker Whisper Cardstock to 21 x 14.8 cms; score the long side at 10.5 cms; Fold & Burnish
2. Trim a piece of Mint Macaron Cardstock to 14.4 x 10.1 cms & mount onto your card blank
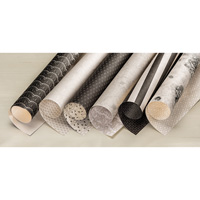
3. Trim a piece of Timeless Elegance Designer Series Paper (DSP) to 14 x 9.7 cms, & Mat onto the Mint Macaron cardstock
4. Trim a piece of Whisper White Cardstock to 11.6 x 7.3 cms
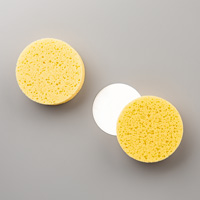
5. Trim a contrast piece of Timeless Elegance DSP to 11.2 x 6.9 cms ; Using a Wedge of Stampin sponge & Mint Macaron Ink Pad, Sponge some of the flowers to make them pop.& mat onto the Whisper White Cardstock. Apply Stampin Dimensionals to the reverse of the panel and mount onto the card front at an angle
6. Trim a piece of Mint Macaron Cardstock to 10 x 1.5 cms/ Stamp with your choice of sentiment from the Greatest Greetings Stamp Set using Basic Black Ink Pad.; Create banner ends by inserting the cardstock in through the top pf the Banner Punch, and guide it between the cutting blades, punch to size; repeat with the opposite end.
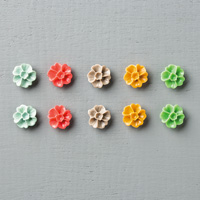
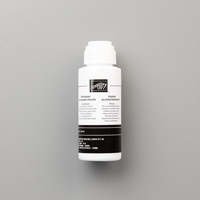
7. Mount the sentiment onto the card front using Stampin dimensionals, and using a drop of Chrystal Effects, add an In Colour Blossom Accent.
2. Trim a piece of Mint Macaron Cardstock to 14.4 x 10.1 cms & mount onto your card blank
3. Trim a piece of Timeless Elegance Designer Series Paper (DSP) to 14 x 9.7 cms, & Mat onto the Mint Macaron cardstock
4. Trim a piece of Whisper White Cardstock to 11.6 x 7.3 cms
5. Trim a contrast piece of Timeless Elegance DSP to 11.2 x 6.9 cms ; Using a Wedge of Stampin sponge & Mint Macaron Ink Pad, Sponge some of the flowers to make them pop.& mat onto the Whisper White Cardstock. Apply Stampin Dimensionals to the reverse of the panel and mount onto the card front at an angle
6. Trim a piece of Mint Macaron Cardstock to 10 x 1.5 cms/ Stamp with your choice of sentiment from the Greatest Greetings Stamp Set using Basic Black Ink Pad.; Create banner ends by inserting the cardstock in through the top pf the Banner Punch, and guide it between the cutting blades, punch to size; repeat with the opposite end.
7. Mount the sentiment onto the card front using Stampin dimensionals, and using a drop of Chrystal Effects, add an In Colour Blossom Accent.

How to Contact or Follow Me
Kim Tolton,
Independent Stampin Up Demonstrator.
Card & Papercraft
Tutorials
Please feel free to
comment below, and ask away with any questions. You can also find me via the
links below
Blog:
Online Store:
Stamping @ The Warren
Craft Forum:
Email:
kim.tolton@googlemail.com
youTube
Pinterest:
Google +
Facebook:
Twittert:
Instagram:
@kim.tolton
LinkedIn:
No comments:
Post a Comment