
Good Day Peeps ... I hope you are having a Good One
Today I have a New Baby Card to share with you all. This could easily be adapted for a baby girl, and even a card for older children, teenagers and even adults, just by switching the inks and Designer Series Paper.
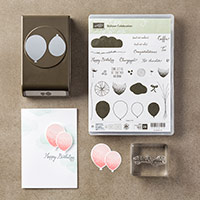
And I have come to really rather love this Super Bundle from Stampin Up!
The Stamp Set and Co-ordinating Balloon Punch, makes this a very versatile stamp set. and the effects you can create are never ending
I have gone with 3 colours in this card
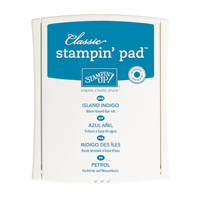
Island Indigo; Tempting Turquoise & Night of Navy
If I were to select inks for girls, it would probably be, Pink Pirouette, Melon Mambo & Rose Red
I have used some Lost L Lagoon Striped Ribbon, and the sentiment was stamped using Night of Navy Ink Pad, and punched out with the Washi Label Punch.
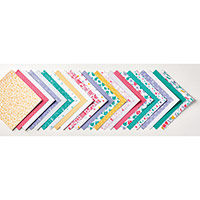
The Designer Series Paper is from the Have A C Cuppa Stack as the colours co-ordinate well with today's colour scheme

- As you scroll down today's
blog post, you will find :
- icons of all the products
used to create today's card - click on them to visit my online store;
- A Video Tutorial
- & a typed tutorial
Feel free to CASE any of my creative
projects (Copy & Paste Everything)
Click on the icons below to view/order
any of the products used in today's tutorial


Watch the Video Below
Tutorial
1. (Card Base)Trim a piece of
Thicker Whisper Cardstock to 21 x 14.8 cms; Score the long side at 10.5 cms; Fold score lines and burnish with a bone folder
2. Trim your Night of Navy Mat layer to 14.4 x 10.1 cms; then trim a piece of regular Whisper White Cardstock to 14 x 9.7 cms.
3. With the cardstock in Landscape mode, randomly stamp the upper half of the panel using the two star stamps and a combination of all 3 ink pads
4. Trim a piece of striped paper from the Have A Cuppa Designer Series Paper Stack, measuring 5 x 13.6 cms; Randomly stamp the DSP using Nigh of Navy Ink Pad & a combination of the two teeny stars stamps; Adhere to the card front using Fast Fuse or Tombow Adhesive.
5. Cut a piece of Lost Lagoon Striped Ribbon to a little wider than the card front and run a strip of Tear & Tape Adhesive along one side; Attach across the centre of the card front and wrap the excess ribbon behind the panel; Mat onto the Night of Navy cardstock.
6. Stamp the sentiment onto a scrap of Whisper White Cardstock using the Night of Navy Ink Pad; Punch out using the Washi Label Punch; Attach the card front onto your Card Base.
7. Onto a scrap f Whisper White Cardstock take the least defined LARGE balloon stamp & ink it up with Tempting Turqoise ink and stamp onto the cardstock.; change the stamp to th LARGE very detailed dotty stamp, and over stamp the balloon using Island Indigo ink; Change the stamp for the LARGE balloon outline stamp, and over stamp your balloon with this, using the Night of Navy Ink Pad.
8. Punch out your stamped balloon using the co-ordinating punch, & also punch a LARGE balloon from Night of Navy Cardstock; Attach the balloons to the cardfront using a combination of Fast Fuse and Stampin Dimensionals (sticky fixers). and Ta Da!!
How to Contact or Follow Me
Kim Tolton,
Independent Stampin Up Demonstrator.
Card & Papercraft
Tutorials
Please feel free to
comment below, and ask away with any questions. You can also find me via the
links below
Blog:
Online Store:
Stamping @ The Warren
Craft Forum:
Email:
kim.tolton@googlemail.com
youTube
Pinterest:
Google +
Facebook:
Twittert:
Instagram:
@kim.tolton
LinkedIn:
No comments:
Post a Comment