
Today I have a super project for you that you can personalise and embellish in your own way
Explosion boxes are super for those special occasions in life, such as a New Baby, or Baby Shower, Wedding Shower, or even made into a combined Memory Box & Album.
The internal size of the box ix a generous 10 cm wide and tall, so it is plenty large enough to contain a gift.
I have split the tutorial over two days as I am sure there are not many of you that have an hour to watch the video in one go.
You can either watch the video below, or view it full screen via my YouTube Channel (just hit the 'share' button on the video below and the video will open up full screen)

- icons of all the products used to create today's card - click on them to visit my online store;
- A Video Tutorial
- & a typed tutorial
Feel free to CASE any of my creative projects (Copy & Paste Everything)
Click on the icons below to view/order any of the products used in today's tutor
Watch the Video Below
 |  |  |  |  |
 |  |  |  |  |
 |  |  |  |  |
 |  |  |  |  |
 |  |
Table built using Product Table Builder by The Crafty Owl - Independent Stampin' Up! Demonstrator.
Tutorial
1. LID Trim a piece of
cardstock to 15 x 15 cms; score on all sides at 2.5 cms; Fold & Burnish all
score lines; Notch out 4 corners notch out the 4 corners & adhere kid
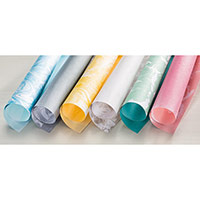
corners using Tombow Liquid Glue; Trim Designer Series Paper to:
- Four pieces
measuring 9.5 x 2 cms
- One piece
measuring 9.5 x 9.5 cms; & adhere to lid.
1. 2. LARGE LAYER - Trim a piece of
12" cardstock to 30 x 30 cms (12" x 12"); score at 10 & 20
cms; rotate by 45 degrees and score again at 10 & 20 cms; using Kraft
Scissors, remove the four outer corners, following the score lines, so you are
left with a cross shaped piece of cardstock; fold & burnish all the score
lines;
3. MIDDLE LAYER - Trim a piece of
cardstock to 27 x 27 cms; score at 9 & 18 cms; Rotate by 45 degrees &
score at 9 & 18 cms fold & Burnish; Cut out the 4 corners to create a
cross shape; Trim the following pieces of Designer Series Paper:
- Four pieces
measuring 8.5 x 8.5
- Four
pieces measuring 8.5 x 8.5 (contrast) & adhere to the middle
layer.
4. SMALL LAYER - Trim a
piece of Cardstock to 24 x 24 cms; score at 8 & 16 cms; Rotate by 45
degrees and score at 8 & 16 cms; cut out the 4 outside corners
Fold & Burnish
& attach to the cardstock Trim the following pieces of
Designer Series Paper to;
- Five pieces
measuring 5.5 x 5.5 cms
- Four pieces
measuring 5.5 x 5.5 cms (contrast)
PART TWO TO FOLLOW
TOMORROW


How to Contact or Follow Me
Kim Tolton, Independent Stampin Up Demonstrator.
Card & Papercraft Tutorials
Please feel free to comment below, and ask away with any questions. You can also find me via the links below
Blog:
Online Store:
Stamping @ The Warren Craft Forum:
Email:
kim.tolton@googlemail.com
youTube
Pinterest:
Google +
Facebook:
Twittert:
Instagram:
@kim.tolton
LinkedIn:
No comments:
Post a Comment