
Today's card is one that I made for my younger son's 29th Birthday last week.
He loves all things aviation, and was in the Air Training Corps in his teens. Asthma prevented a career in the RAF, but this has not caused his love of all things plane orientated one jot. He particularly loves the vintage armed forces planes, and loves attending the annual season of Air Shows here in the UK
So when Stampin Up! Brought out this limited edition rubber stamp set as part of the Sale A Bration promotion this year.. it was an absolute must have for me.

_______________________________________________________________
As you scroll down
today's blog post, you will find :
·
icons of all the products used to create today's card - click on them to
visit my online store;
·
A Video Tutorial
·
& a typed tutorial
Feel free to CASE
any of my creative projects (Copy & Paste Everything)
Click on the icons
below to view/order any of the products used in today's tutor
 |  |  |  |  |  |  |
 |  |  |  |  |  |  |
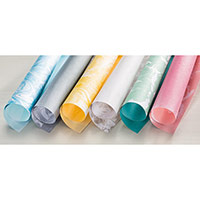 |  | 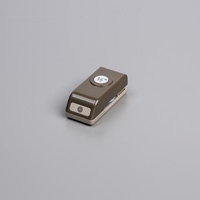 | 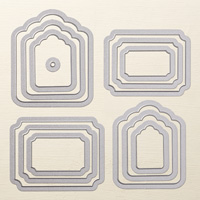 |  |  |  |
Table built using Product Table Builder by The Crafty Owl - Independent Stampin' Up! Demonstrator.
Watch the Video
Below
Tutorial
- Trim a piece of Thicker Whisper White Cardstock to 12.5 c 27 cms (5" square card base); Score the long side at 13.5 cms (5"); fold & Burnish
- Trim a piece of Tip Top Taupe Perfectly Artistic Designer Series Paper (DSP) to 13 x 13 cms & mat (layer) onto your card base.
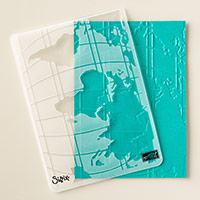
- Trim a piece of Crumb Cake Cardstock to 13 x 13 cms & tear along the diagonal &using your Big Shot, dry emboss using the World Traveller TIEF (embossing folder), adhere to the card front.
- Trim a piece of Very Vanilla Cardstock to 8 x 8 cms & randomly stamp the plane image using Archival Basic Black ink pad.
- Punch a 1/2" circle of White Vellum, and using a Paper Piercing Tool, make a hole in the centre, and also a hole in the centre of one of your stamped plane propellers. Pop a Mini Silver Brad through the vellum and cardstock and secure on the back.
- Mat onto a piece of Lost Lagoon Perfectly Artistic DSP measuring 8.4 x 8.4 cms; add stampin dimensionals to the back and mount at an angle onto your card front.
- Stamp the Birthday Greeting from the stamp set using Archival Black ink pad, onto a scrap of Very Vanilla Cardstock, and die cut using the Tags & Labels Framelits Dies, with your Big Shot and either the Multi-Purpose Platform on Tab 2 OR preferably the Magnetic Platform. Mount onto the card front using Stampin Dimensionals

How to Contact or
Follow Me
Kim Tolton, Independent Stampin Up Demonstrator.
Card & Papercraft Tutorials
Please feel free to comment below, and ask away with any questions. You
can also find me via the links below
Blog:
Online Store:
Stamping @ The Warren Craft Forum:
Email:
kim.tolton@googlemail.com
youTube
Pinterest:
Google +
Facebook:
Twittert:
Instagram:
@kim.tolton
LinkedIn:
No comments:
Post a Comment