

Before I get to today's tutorial, I feel the need to explain my leave of absence. The reason is that I have been very poorly. My hubby, Steve, has been my brick, as I have struggled through two bouts of Influenza, Pleurisy & pneumonia! Just one of these on it's own, would be enough to knock most of us back, but my challenge with the above has been a difficult and lengthy one. I cannot remember a time when I have not spent at least two full days a week in my workshop. I hadn't gone in there since my last video/blog, and earlier this week, when I decided to get my Card Swaps done for this weekends Stampin Up! On Stage Live event in Telford. It is a great event for Demonstrators across the UK, and for most of us, it is out annual chance to catch up with one another, and bring back lots of swaps, to give us fresh ideas for out own workshop events. So watch this space, as I may be sneaking in some of those swaps to share with you.
Anyway, until my health is back to normal (hopefully another couple of weeks should have me firmly back on my feet) I will stick to 3 video's a week. Thank you for sticking with me!! I really appreciate it.
________________________________________
As you scroll down
today's blog post, you will find :
·
icons of all the products used to create today's card - click on them to
visit my online store;
·
A Video Tutorial
·
& a typed tutorial
Feel free to CASE
any of my creative projects (Copy & Paste Everything)
Click on the icons
below to view/order any of the products used in today's tutor
 |  |  |  |  |  |  |
 |  |  |  |  |  |  |
 |  |  |  |  |  |  |
 | 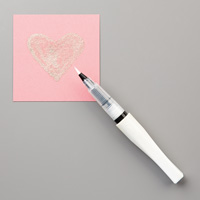 |
Table built using Product Table Builder by The Crafty Owl - Independent Stampin' Up! Demonstrator.
Watch the Video Below
Tutorial
- Trim a piece of Crumb Cake Cardstock to 30 x 10.5 cms; Score at 14.8 cms; Fold & Burnish (Card Base)
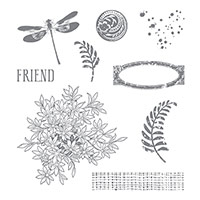
- Trim a piece of Shimmery White Cardstock to 10 x 10 cms; stamp two corners with the flower stamp, using the Versamark Ink Pad, dust with Clear embossing Powder & Heat Set.
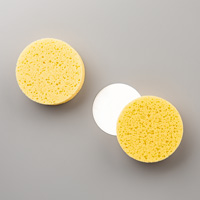
- Using a wedge of Stampin Sponge and the Tip Top Taupe Ink Pad, sponge the card front, with the emphasis on the embossed areas,, use a piece of tissue to wipe off any excess ink to the embossed areas.
- Mat onto a piece of Tip Top Taupe Cardstock measuring 10.4 x 10.4 cms
- Stamp the dragonfly onto a scrap of Tip Top Taupe Cardstock using Archival Basic Black Ink Pad; Cut out using your Paper snips.
- Stamp the FRIEND stamp in the centre of the panel, using Archival Basic Black Ink
- Stamp the front of your card base with the flower stamp using Tip Top Taupe Ink Pad; Mount the embossed panel onto the centre of the card base; add the Dragonfly, using a Stampin Dimensional.
- Finish by adding a few Basic Rhinestones, and glitter to the dragonfly using the Clear Wink of Stella Glitter glue Brush.


How to Contact or
Follow Me
Kim Tolton, Independent Stampin Up Demonstrator.
Card & Papercraft Tutorials
Please feel free to comment below, and ask away with any questions. You
can also find me via the links below
Blog:
Online Store:
Stamping @ The Warren Craft Forum:
Email:
kim.tolton@googlemail.com
youTube
Pinterest:
Google +
Facebook:
Twittert:
Instagram:
@kim.tolton
LinkedIn:
No comments:
Post a Comment