

________________________________________
As you scroll down
today's blog post, you will find :
·
icons of all the products used to create today's card - click on them to
visit my online store;
·
A Video Tutorial
·
& a typed tutorial
Feel free to CASE
any of my creative projects (Copy & Paste Everything)
Click on the icons
below to view/order any of the products used in today's tutor
 |  |  |  |  |  |  |
 |  |  |  |  |  |  |
 |  |  |  |
Table built using Product Table Builder by The Crafty Owl - Independent Stampin' Up! Demonstrator.
Watch the Video
Below
Tutorial
- Card Base:- Trim a piece of Tip Top Taupe Cardstock to 30 x 10.5 cms; score at 14.8 cms; fold & Burnish
- Trim a piece of Very Vanilla Cardstock to 14 x 9.7 cms
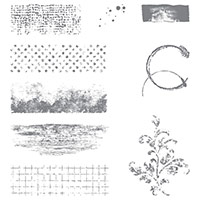
- Stamp the edges of the cardstock with the faux wood stamp from the Timeless Textures Stamp Set using Tip Top Taupe Ink Pad
- Over-stamp the border using the faux typeset stamp and Delightful Dijon Ink Pad; Stamping off some of the ink onto scrap paper before stamping the card stock (stamping off technique)
- Using the Watermelon Ink Pad, stamp a flourish in each corner, then using stamping off the page technique (i.e. stamping just part of the image onto the cardstock) stamp around the border, but do not over do this.
- Trim a of Very Vanilla Cardstock to 6.5 x 5.5 cms, stamp the sentiment from Trust God Stamp Set, using Soft Suede Ink Pad; Mat onto a piece of Watermelon Wonder Cardstock measuring 5.9 x 6.9 cms using Fast Fuse or Tombow Adhesive
- Using a Paper Piercing Tool. make a small hole in the top two corners, and thread with a length of Linen Thread and tie a knot, adjusting the length according to where you are going to place the topper on the card
- Position the topper at an angle on the stamped cardstock (do not stick down at this stage) and using your paper piercing tool, make a hole where the brad will go to act as the hanger for the topper..
- Use the Antique brad to secure the linen thread in place, add Stampin Dimensionals to the back of the topper and position on the cardstock.
- Add Stampin Dimensionals to the back of the larger panel and mount onto the card base.
- Finish with some Basic Rhinestones
How to Contact or
Follow Me
Kim Tolton, Independent Stampin Up Demonstrator.
Card & Papercraft Tutorials
Please feel free to comment below, and ask away with any questions. You
can also find me via the links below
Blog:
Online Store:
Stamping @ The Warren Craft Forum:
Email:
kim.tolton@googlemail.com
youTube
Pinterest:
Google +
Facebook:
Twittert:
Instagram:
@kim.tolton
LinkedIn:
No comments:
Post a Comment