
I hope your morning is as bright and warm as it is here in sunny Essex (UK)?
So what if we do have torrential rain and thunder storms later ... for now, all is well with my world
My first post pre-order delivery arrived yesterday, and there are some amazing products in there. I cannot wait to start playing with them !!!
If you follow my blog, you will have identified that there is always a lag between my videos tutorials and the blog posts. The reason is that it takes 2-3 days to upload one video, but I do my best to keep the images and the video synchronized.
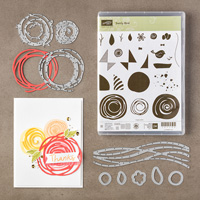
Today we are talking Swirly Birds and Swirly Scribbles.
These super products from the New Stampin' Up! Catalogue, can be purchased separately, OR save 10% if you purchase the Stamp Set/Intricate Thinlits Die Set as a BUNDLE.
So when you browse the products I have used today (see below), I have given you the Bundle option. Click on any of the icons to view or order then via my online Store

And I have given you four card examples for the price of one. I combined the Swirly Squiggles Stamp Set with the One Big Meaning Stamp Set, to create an additional four examples of today's Bundle ... all have been made using the New In Colours. You will see that there are many other stamps, including stamps to create a sail boat, a kite and much more as you can let your creativity flow!
Feel free to CASE any of my creative projects (Copy & Paste Everything)

Click on the icons below to view/order any of the products used in today's tutorial
 |  |  |
 |  |  |
 |  |  |
 |  |  |
 |  |  |
 |
Table built using Product Table Builder by The Crafty Owl - Independent Stampin' Up! Demonstrator.

Watch the Video Below

Tutorial
Today's tutorial is for the first card only, but use the same products to create to your hearts content
- Trim a piece of Mint Macaron Cardstock to 30 x 10.5 cms (A6 Card Base); Score the long side at 14.9 cms; fold & Burnish
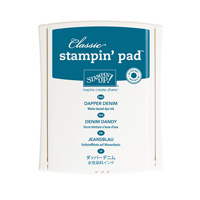
- Trim a piece if Whisper White Cardstock to 3 cms x 10.1 cms; using the Dapper Denim Ink Pad, stamp the Thank You sentiment from the One Big Meaning stamp set ; add a few Stampin Dimensionals to the back of the label
- On a scrap of of Whisper White Cardstock, stamp two of the sketched flowers and either Die Cut using the Swirly Squigles Thinlits Die OR Fussy Cut by Hand. Mount onto the sentiment lavel using a couple of Stampin Dimensionals and add a Rhinestone to each.
- Next, select two different sized squiggles from the stamp set, and randomly stamp the front of the card base using the Mint Macaron Ink Pad.
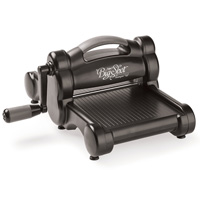
- Next, use the Big Shot to die cut 3 or four of the swirly squigles thinlits dies (best results with the Magnetic platform or the Precidion Plate.
- Using the Fine Tip Glue Pen, apply a thinl layer of adhesive to the back of the cie cuts and attach to the card front , press firmly to vond the cardstock
- Next select the Thinlits Dies you want to use to create the faux embossed card front. I used 3 different sizes in a mix of Mint Macaron & Dapper Denim cardstock
- Mount your Sentiment Label to the top of the card base and you are all done.

How to Contact or Follow Me
Kim Tolton, Independent Stampin Up Demonstrator.
Card & Papercraft Tutorials
Please feel free to comment below, and ask away with any questions. You can also find me via the links below
Blog:
Online Store:
Stamping @ The Warren Craft Forum:
Email:
kim.tolton@googlemail.com
youTube
Pinterest:
Google +
Facebook:
Twitter:
Instagram:
@kim.tolton
LinkedIn:
No comments:
Post a Comment